After the toilet was mostly finished, I started on the laundry area. The laundry is situated in the back of the room, to the right of the toilet.
The laundry area needs a washing machine of course, so I started putting together all kinds of bits and pieces which I thought I could use for making a washing machine. Most of them were too big or just too small. I felt a bit like Goldilocks ;-)
I did make a little door which I was quite pleased with but in spray painting outside a sudden gust of wind blew in lots of tiny specs of dust which meant taking everything off again, re-sanding, re-priming, re-spraying. It came out OK in the end.
I need a lot more materials (textures really) than I have in my stash so that may take a while. In the mean time I made a trial piece out of card.
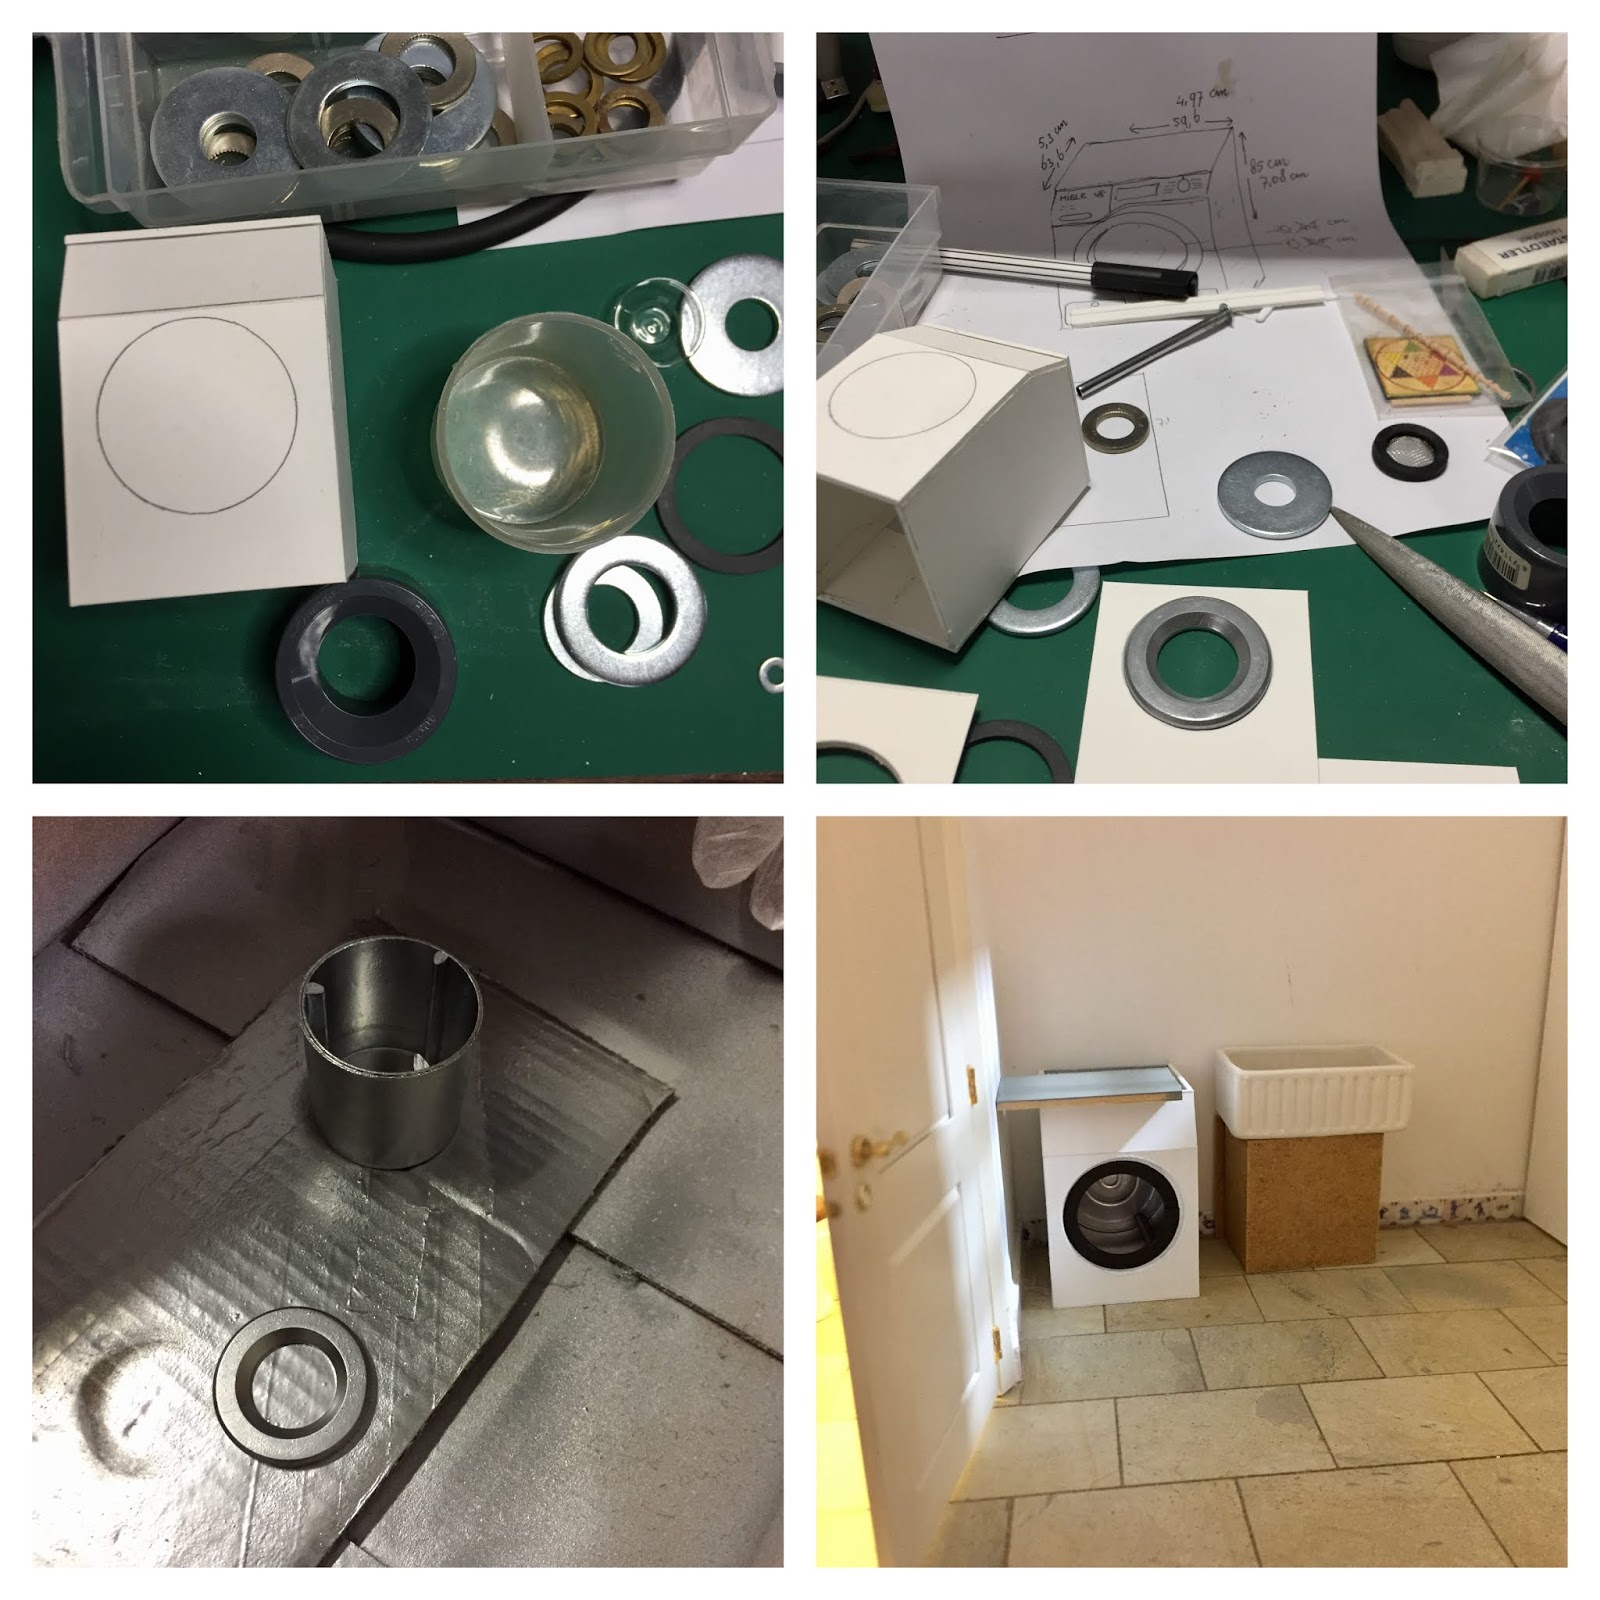
Its a good thing I did do a trial piece because I ran into a lot of problems with paints and glues etc.
I do like the look of it but it has many issues. The chrome paint is a problem. Even after a two day drying time it came off with the slightest touch so I wont be using that. I will turn the door on my lathe using brass or some other metal. Maybe even have it chromed.
I will need to do some serious art work on my computer to create the control panel. I did not make the soap drawer on this one but the next one will get a slide out one.
The hinge was a problem too. On these photos the hinge is replaced with some duct tape which will not do at all of course. So lots more to do on that one.
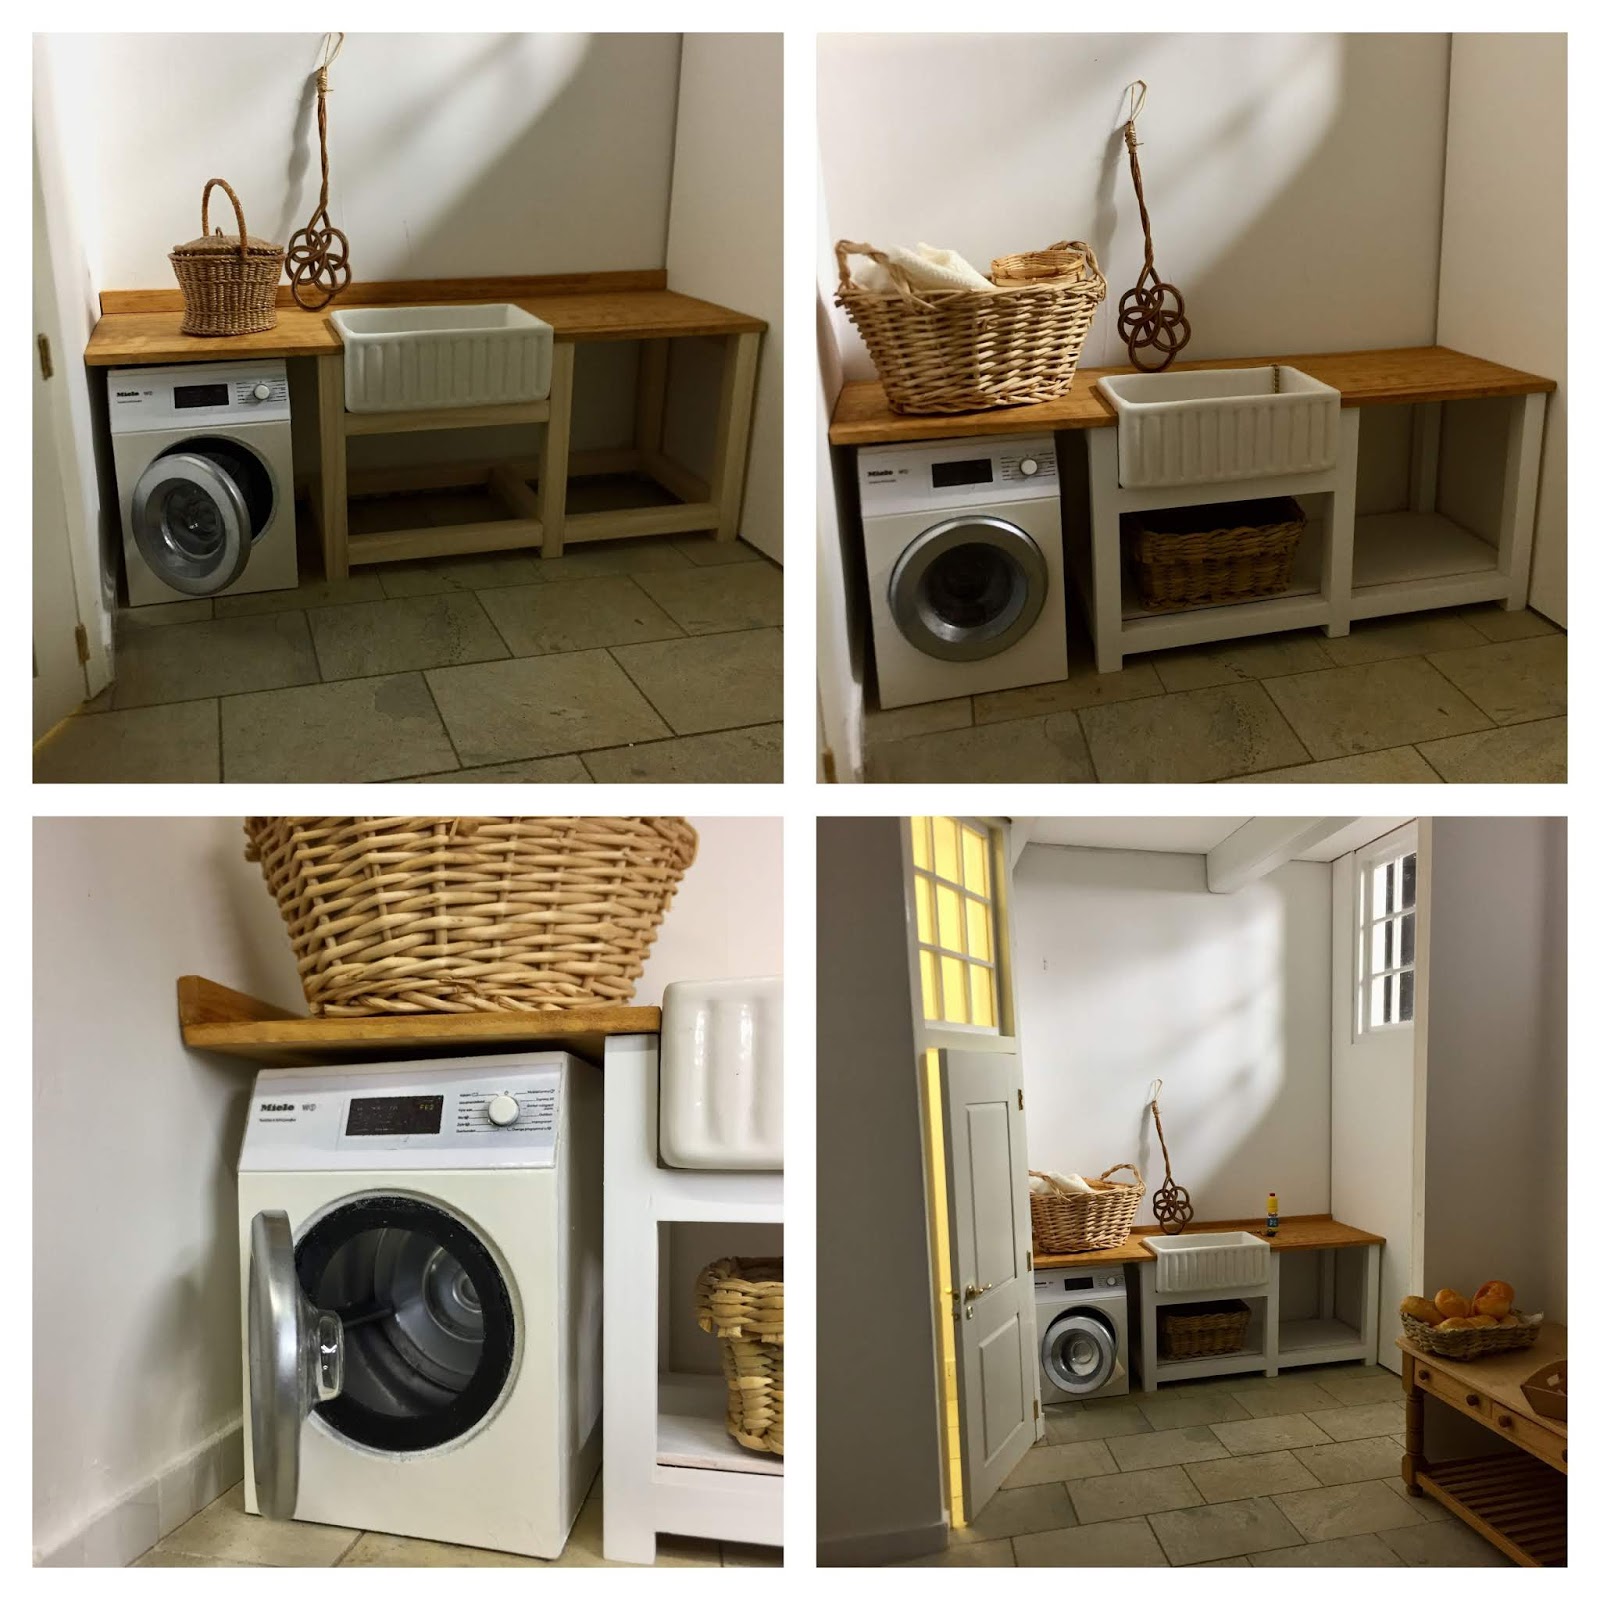
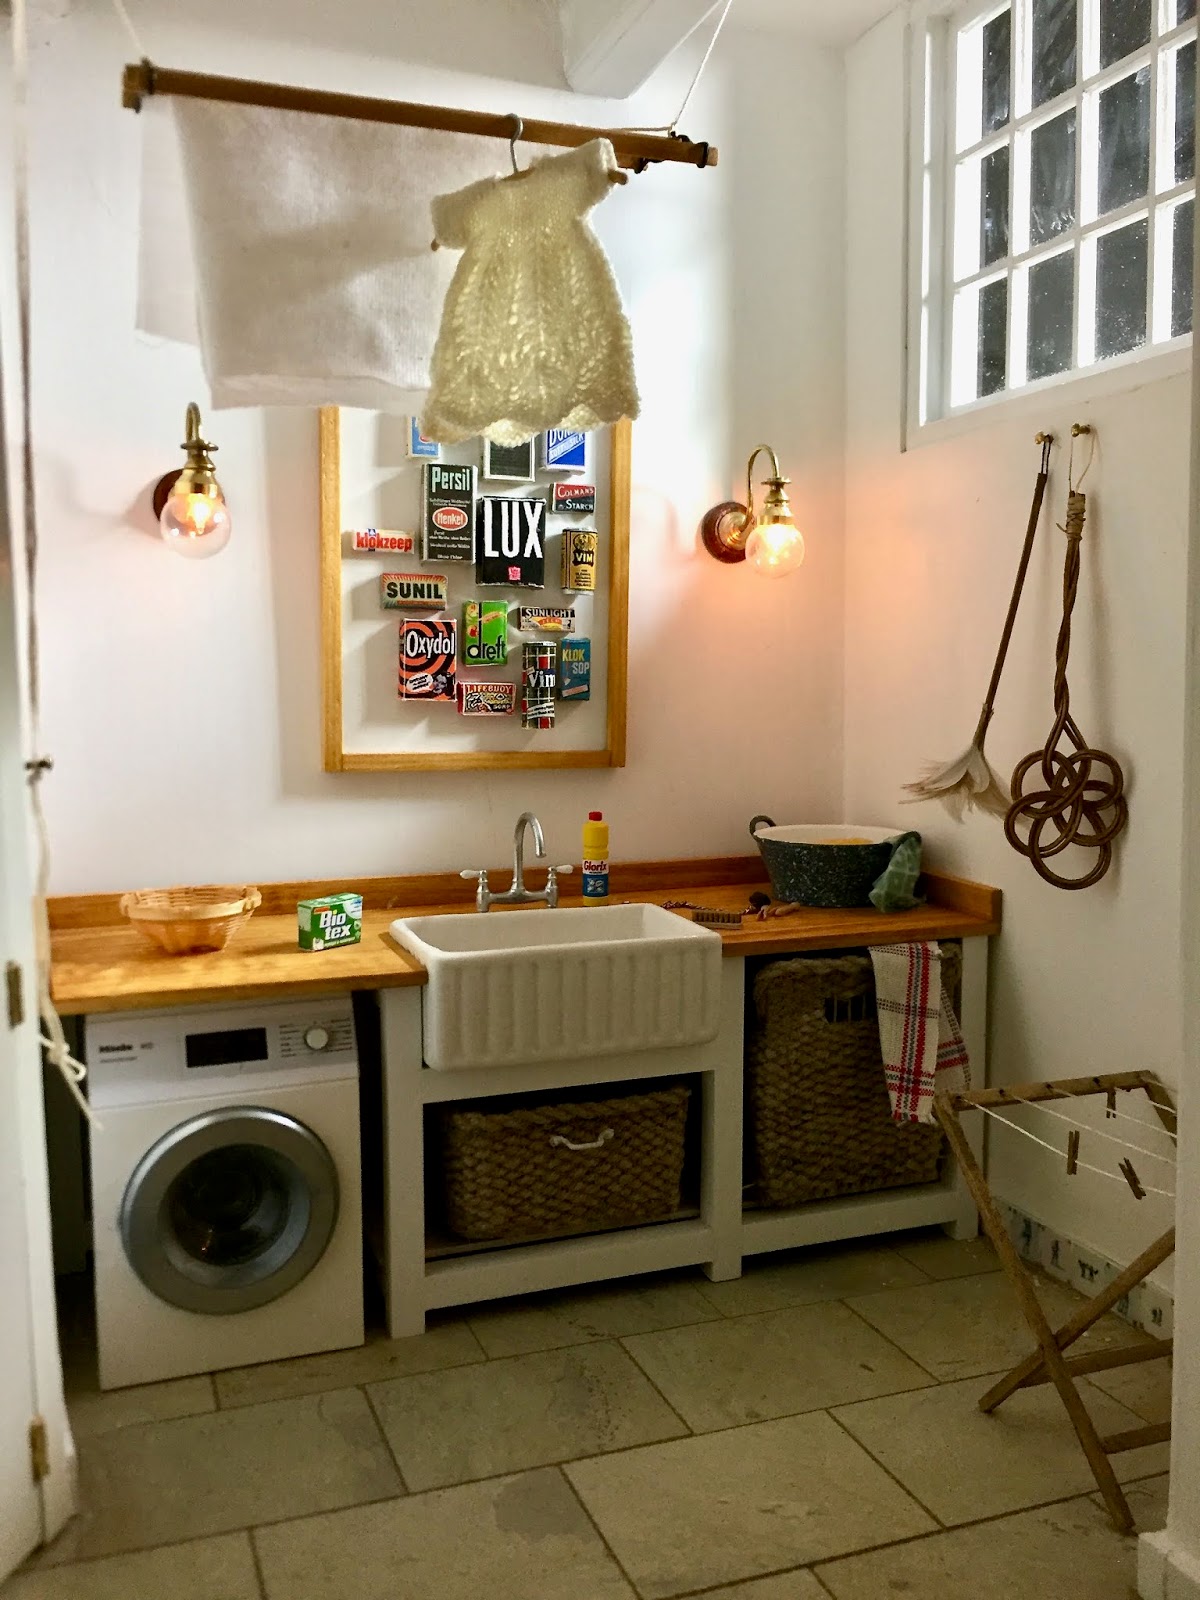
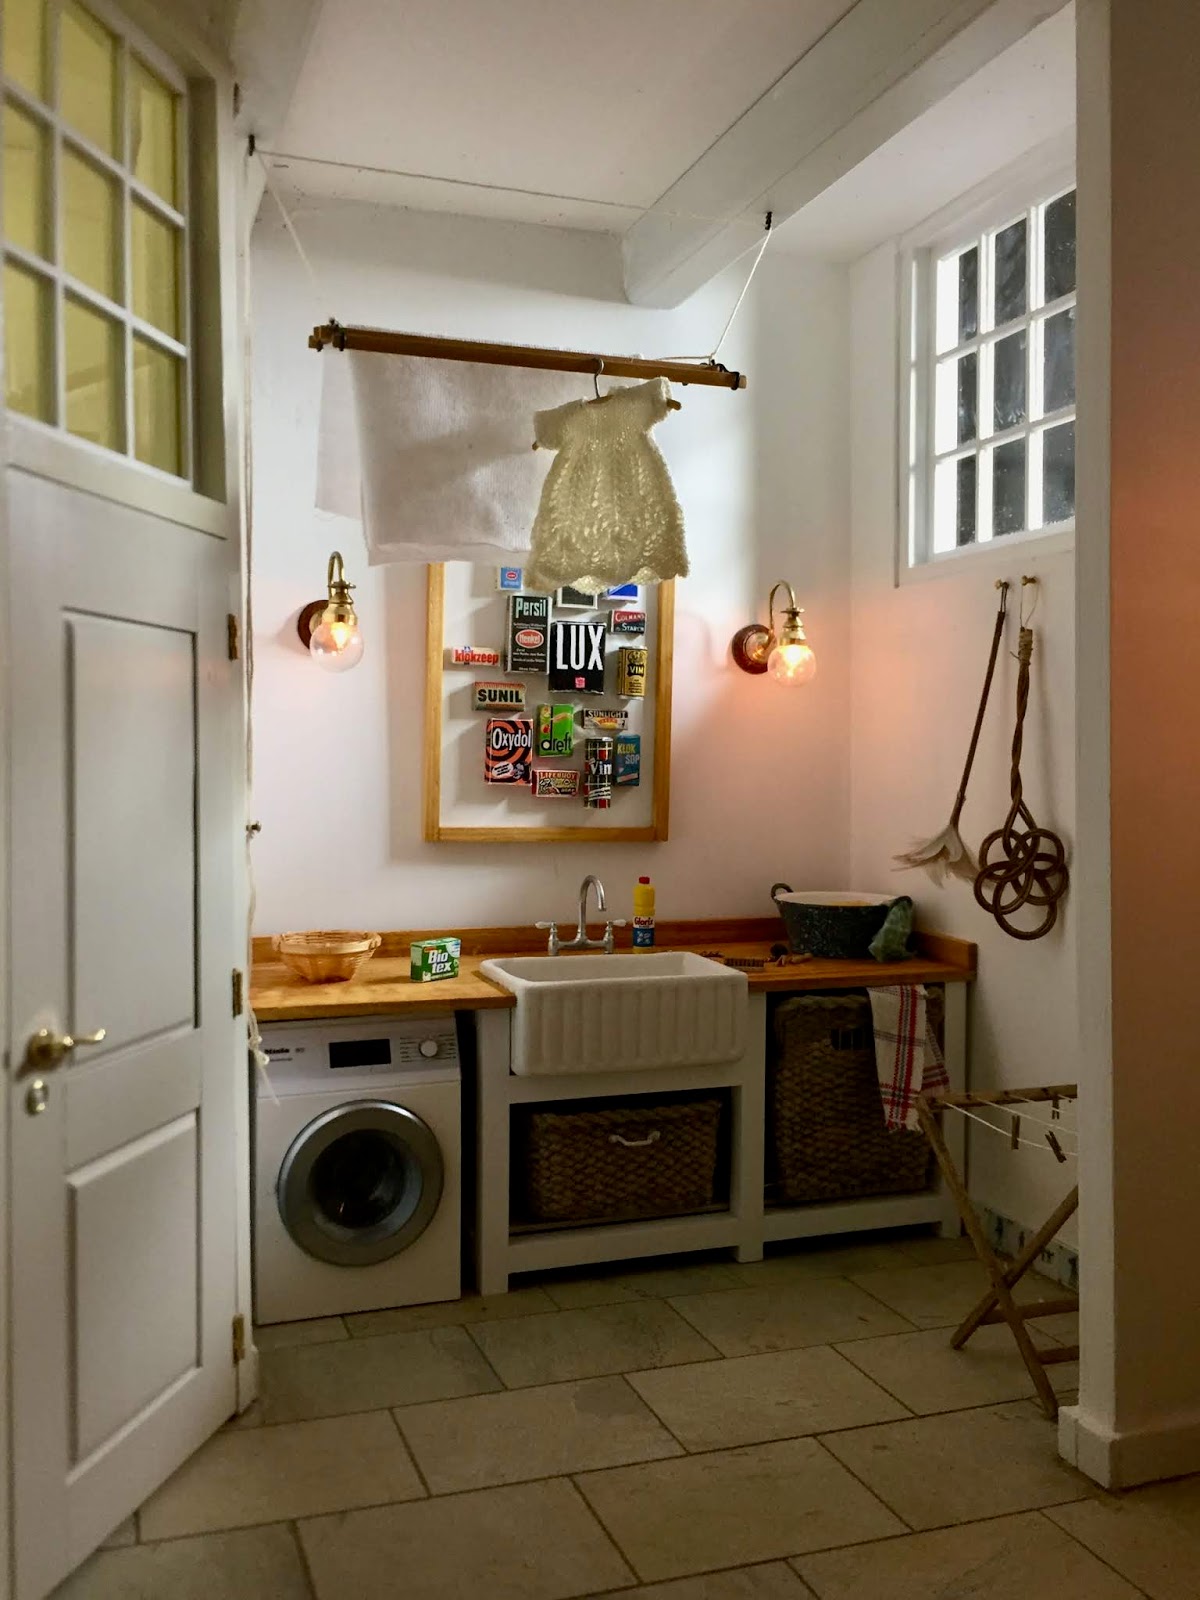
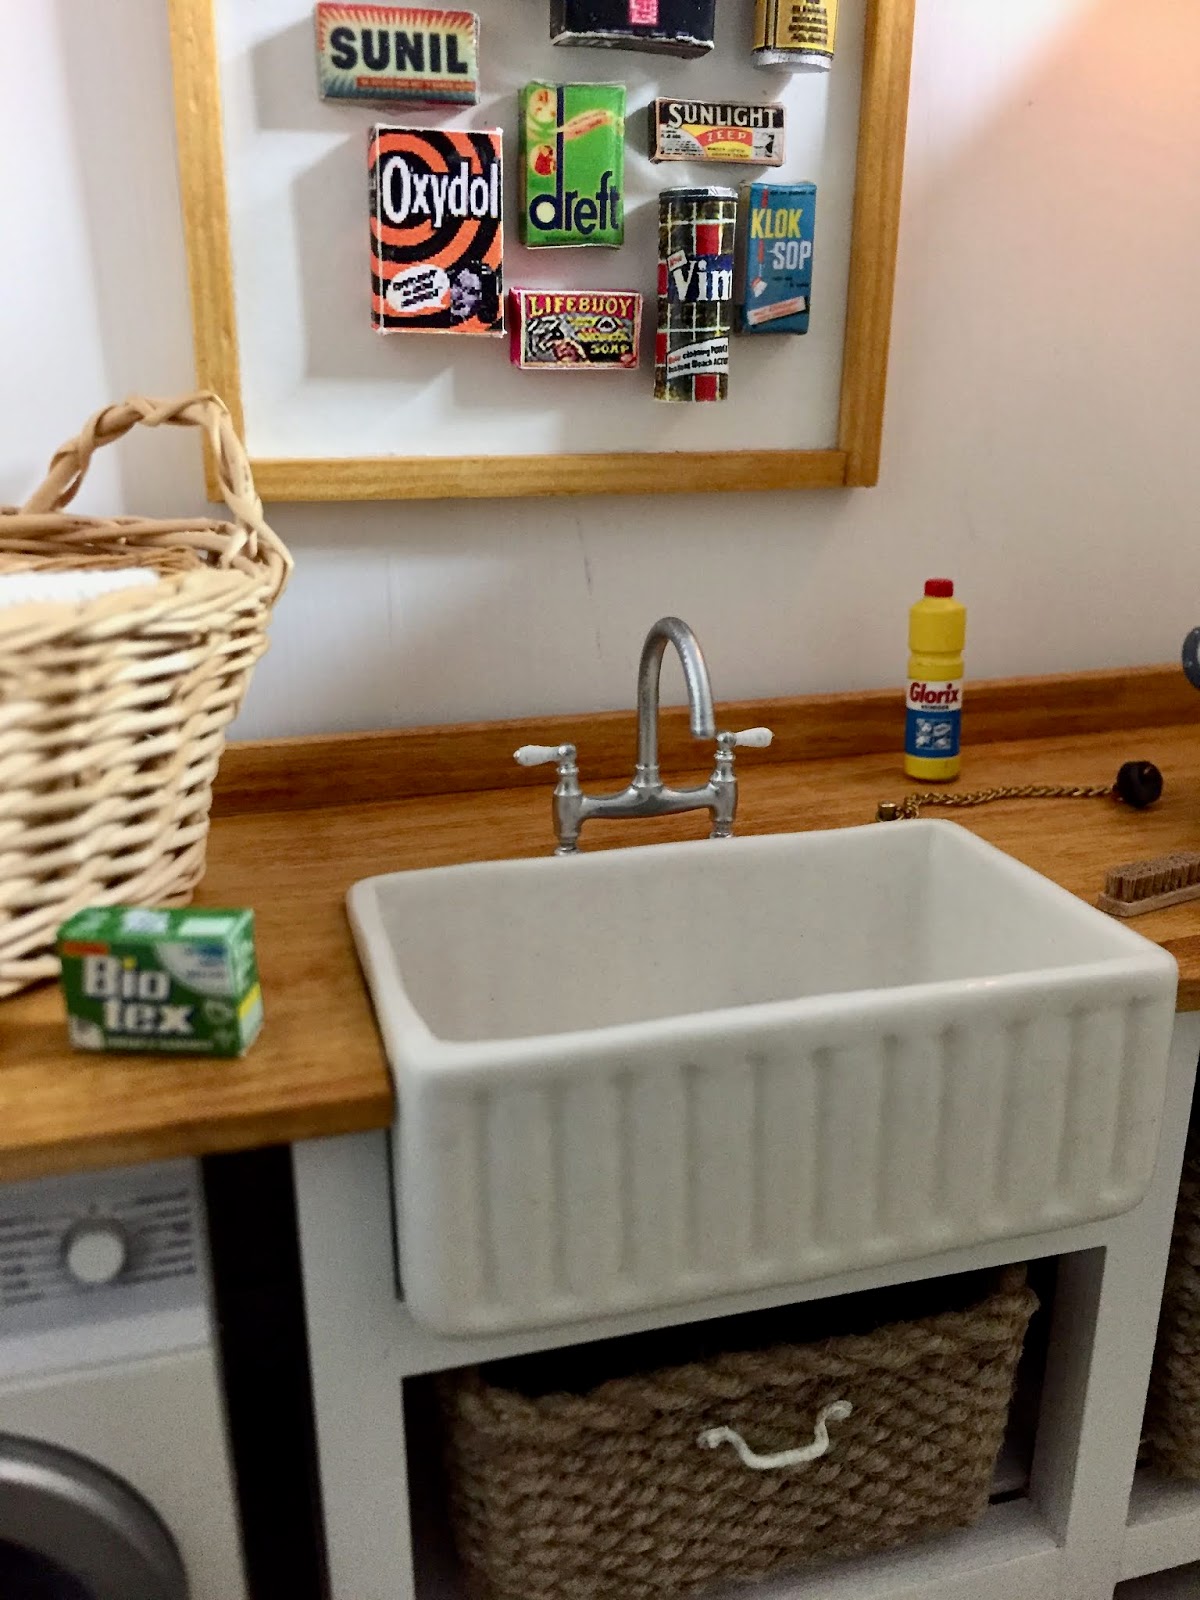
Ive built a simple frame to support a worktop and butler sink. The butler sink is one from one of my first projects which I have now pulled apart. I spent the best part of Sunday creating a drain pipe for the sink only to find you cant see it at all ;-)
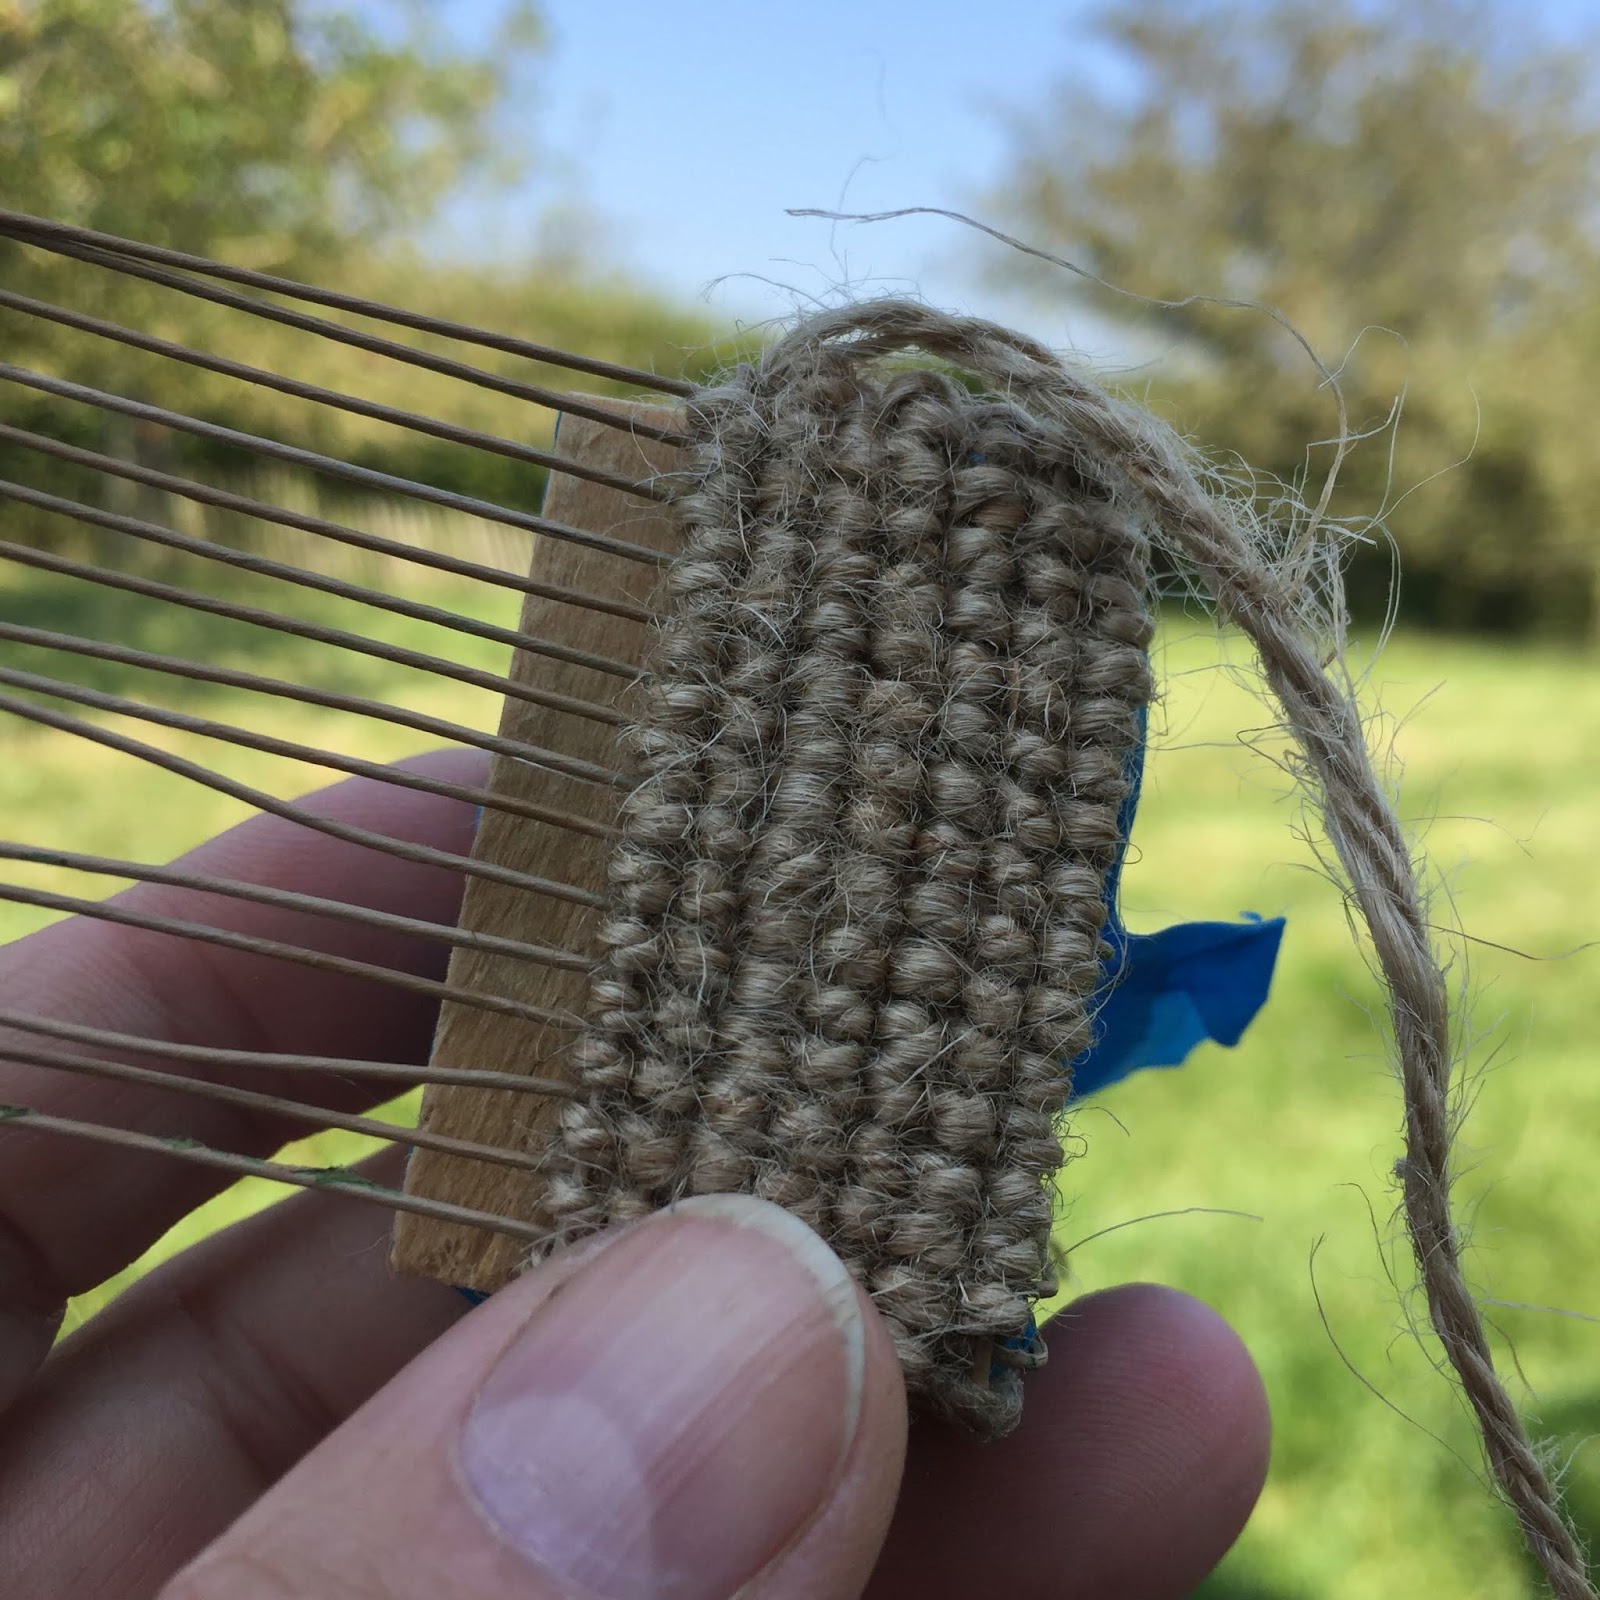
For the spacesunderneath the sink and counterI wanted to make laundry baskets. Years ago I bought several spools of waxed linen thread for basket making, but after two days of searching for them I couldnt find them. Theyll turn up somewhere, someday.
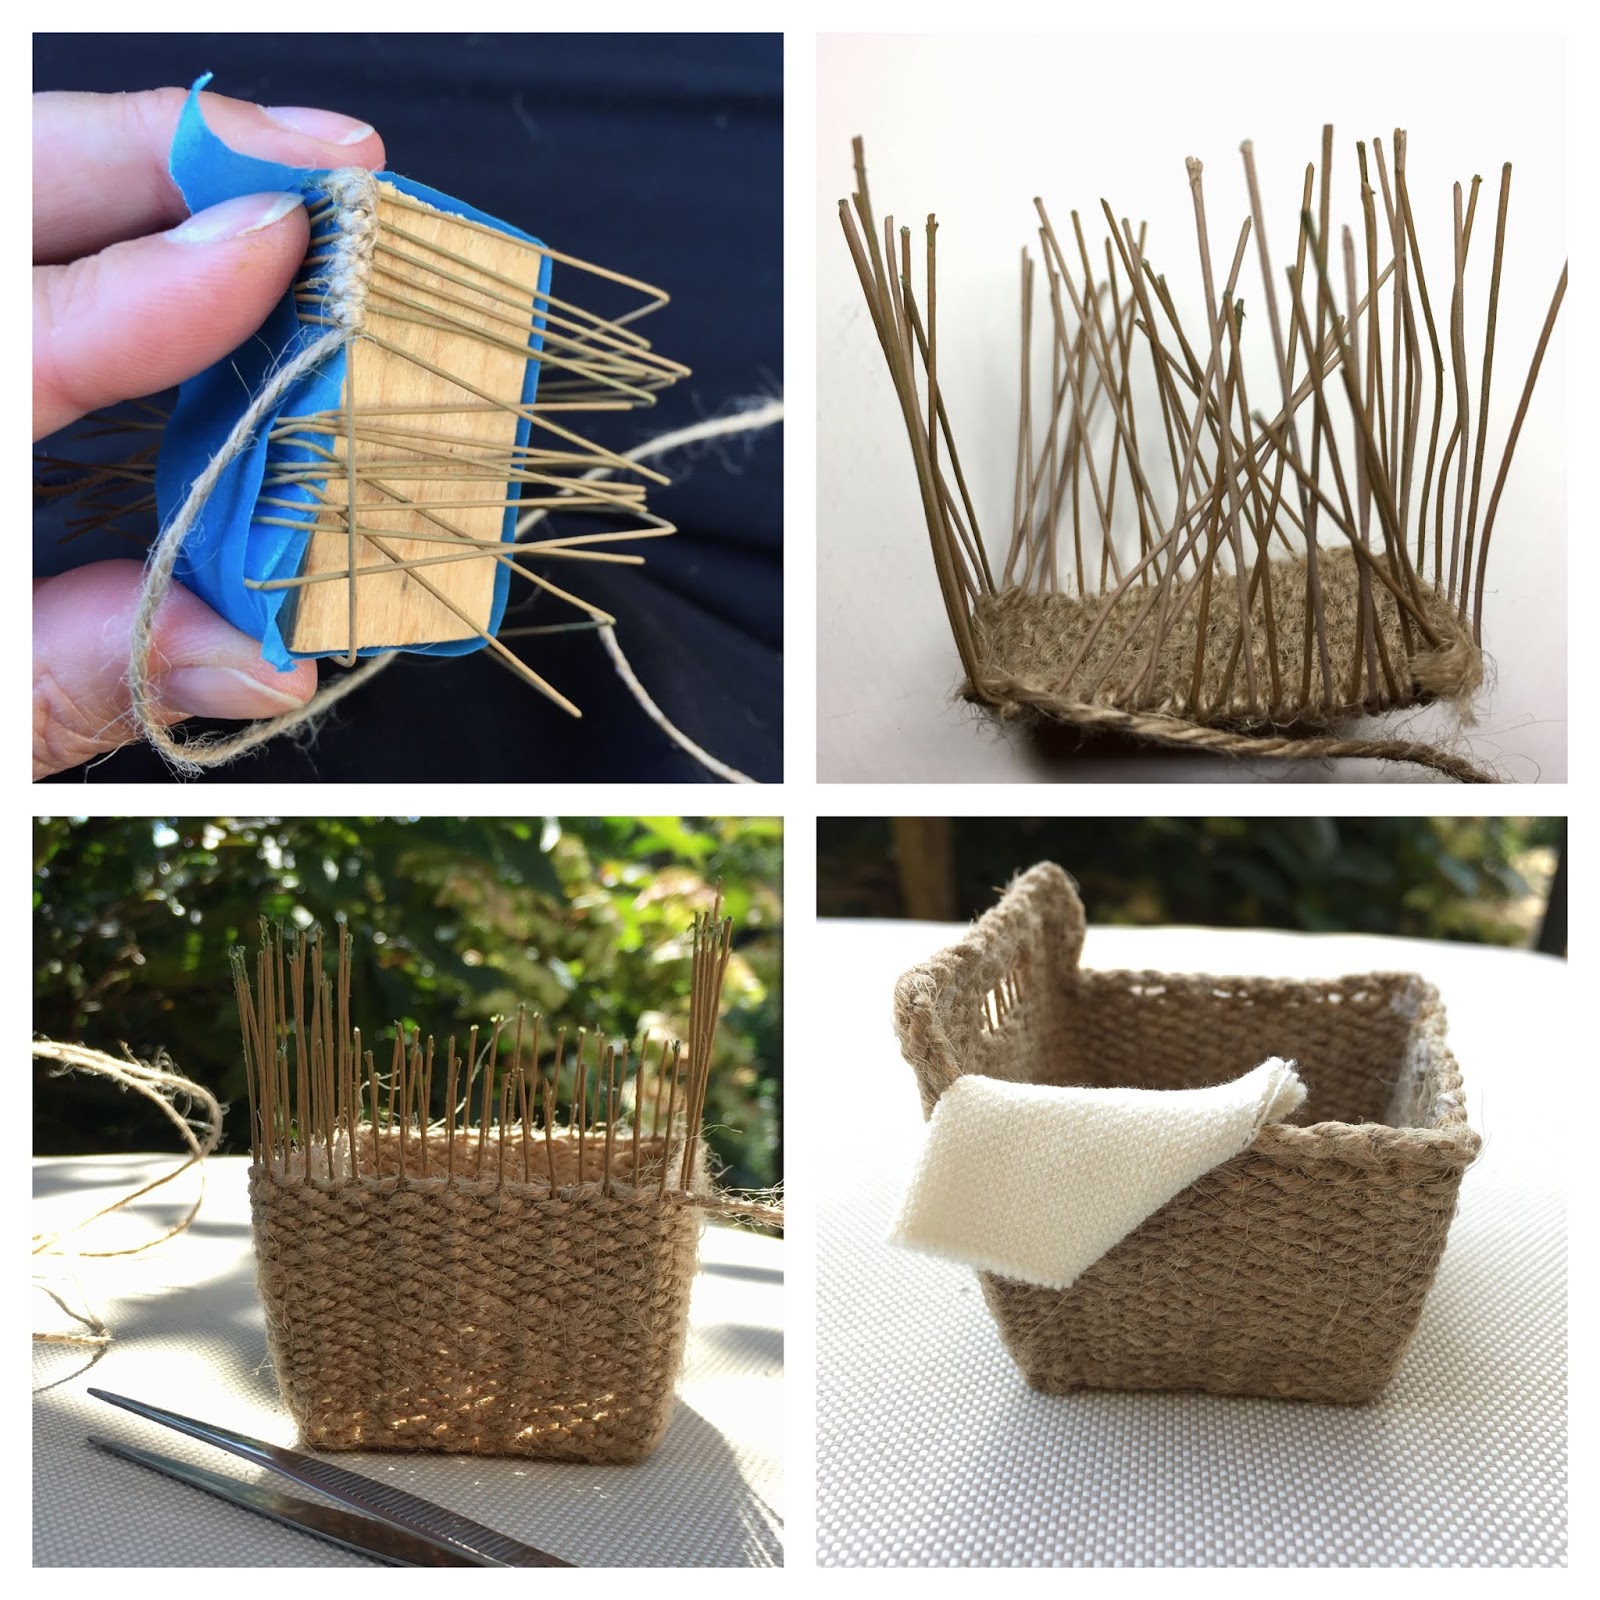
In the mean time I was doing a few odd jobs in the garden (this was back in August when the weather was warm and sunny) and found a huge spool of sisal twine which I thought could be a fun replacement for the waxed linen. So, not hindered by any knowledge of basket weaving, I set to work, making it up as I went along really. I must say I did have several baskets made by other people which I used as a bit of a guide and looked at some photos online.
The results were actually quite nice so I continued with it. I made a small basket for under the sink and a big laundry basket. They both turned out slightly too big so I had to start again and improve on them a bit as, as you can see in the photos, the sides arent quite straight and I stupidly put on super glue which left an ugly white stain.
It was a nice job to work on sitting in the shade in the garden.
The second try on my laundry baskets was better. The sides are straight and they fit! The large basket pivots around a brass wire on the bottom so you can tilt it forward and drop in some laundry. A little video below:
I made a 3D collage of several old boxes of cleaning products and washing powder for the laundry area. I think it is a fun piece for the wall above the sink.
I also installed two wall lights, a combination of classic Ray Storey wall lights and two glass globes (Heidi Ott I believe).
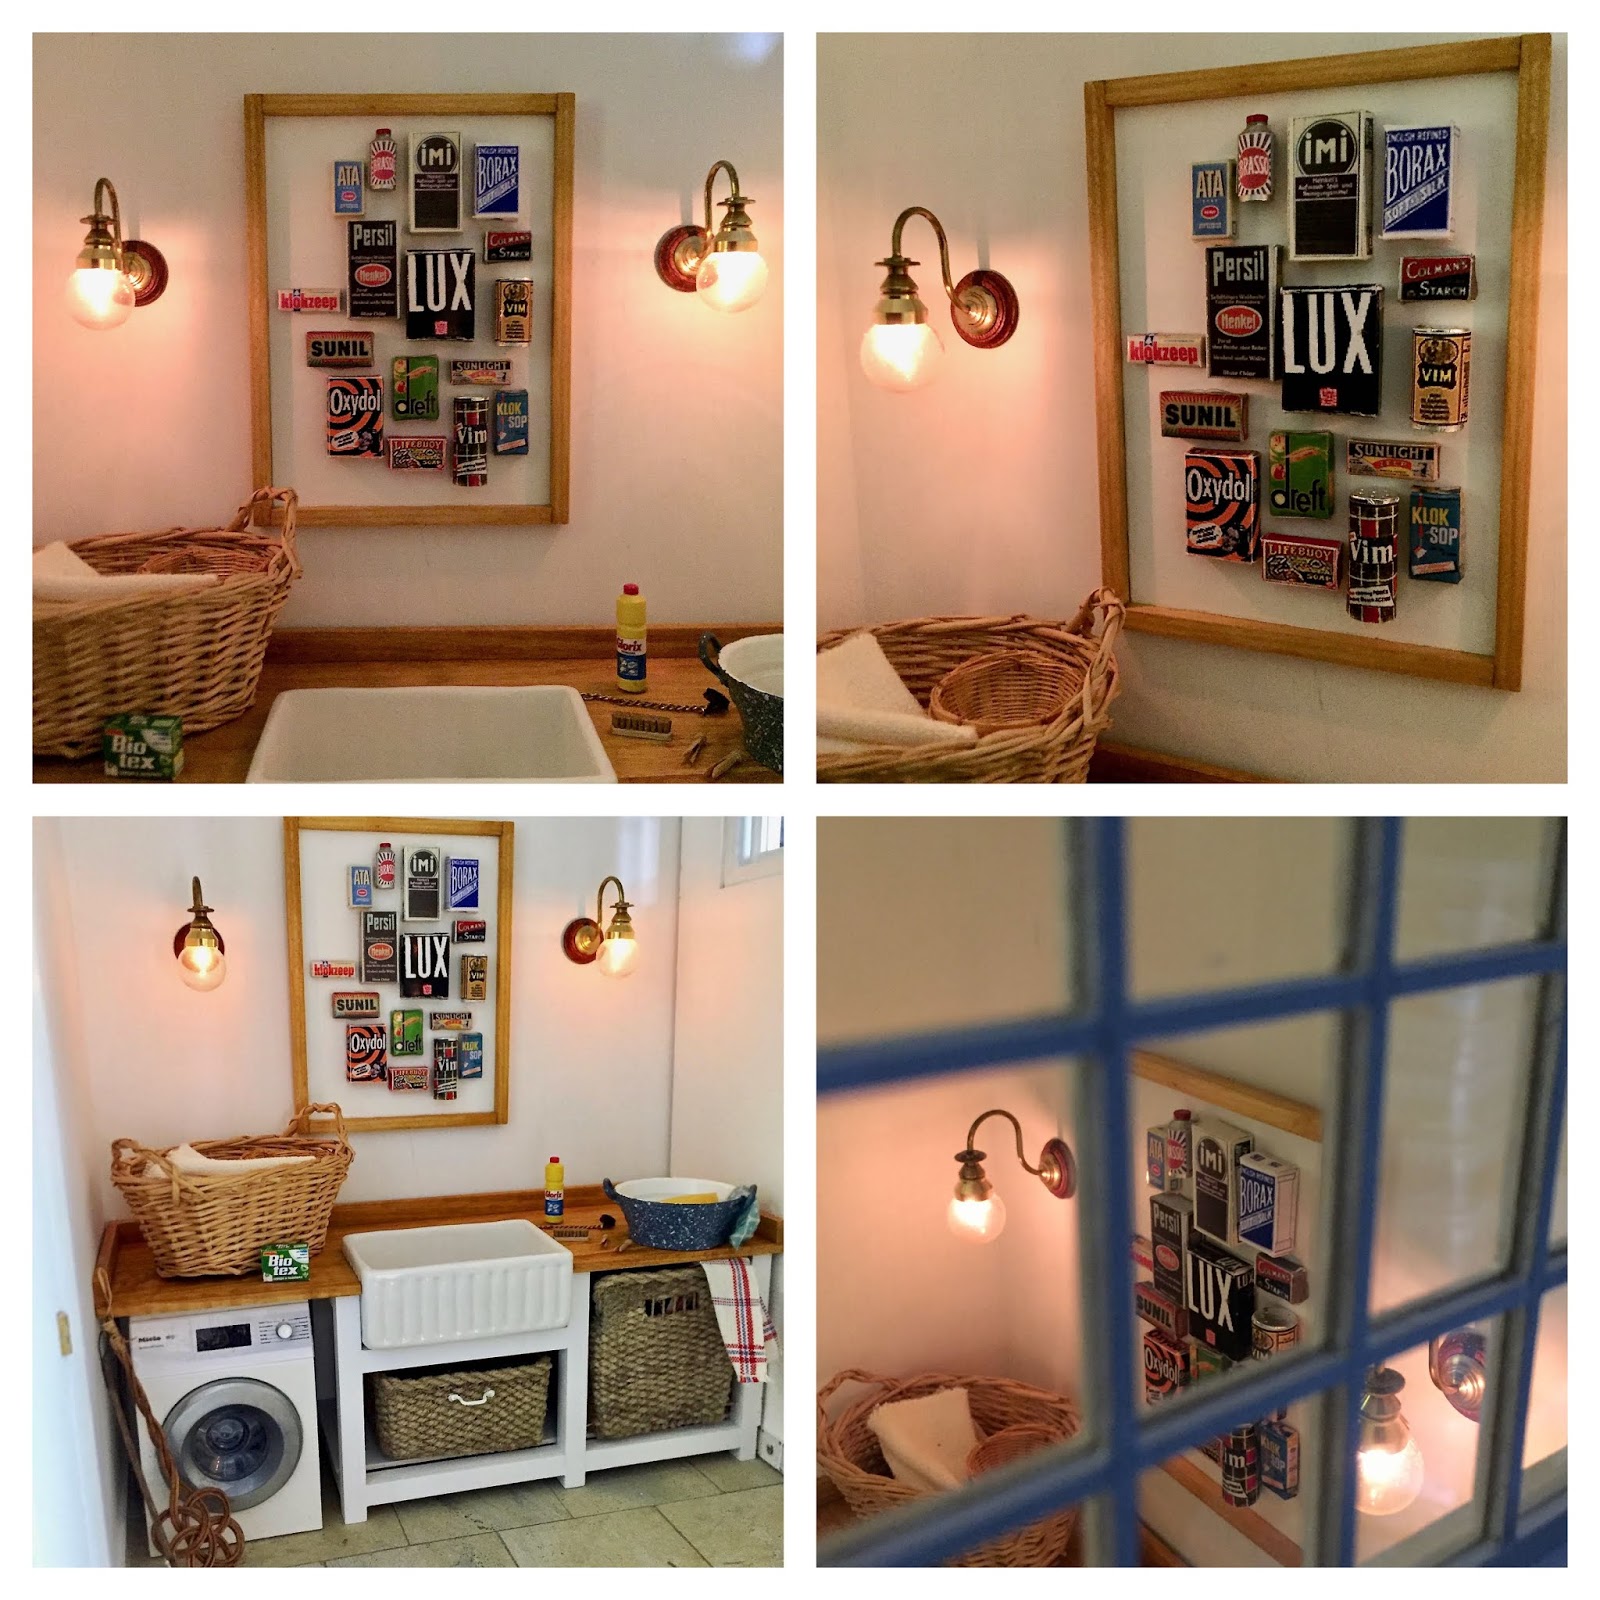
The only thing missing now was a tap for the sink. I ordered several 3D printed items from Shapeways, one of them the traditional bridge faucet for the laundry area from Paper Doll Miniatures (Kristine Hanna).
To spray paint these small items, I drilled holes in an old bit of wood and mounted the miniatures in them. This way it is much easier to hold the pieces when spray painting them. After a layer of plastic primer I chose a chrome finish for all of the pieces.
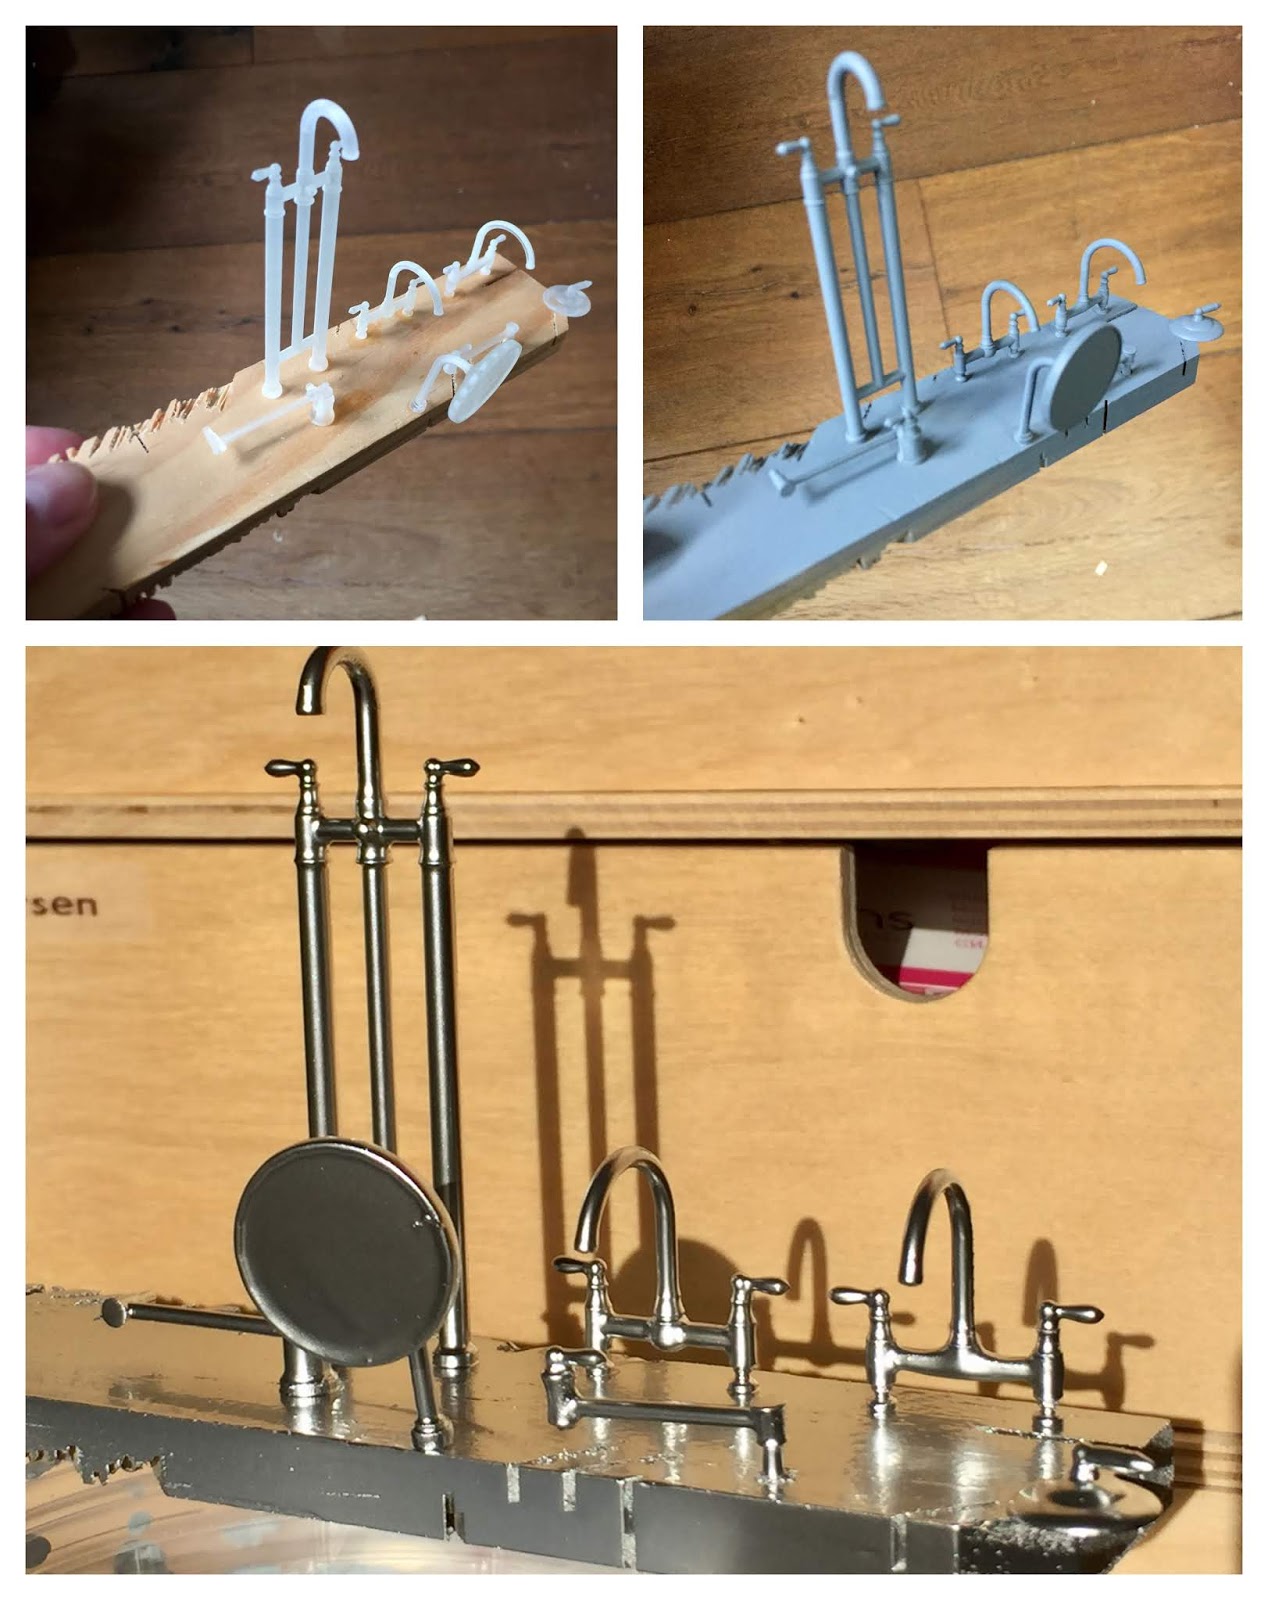
All of the faucets turned out rather nice, although the chrome finish did dry a little more matte than the photo above shows.

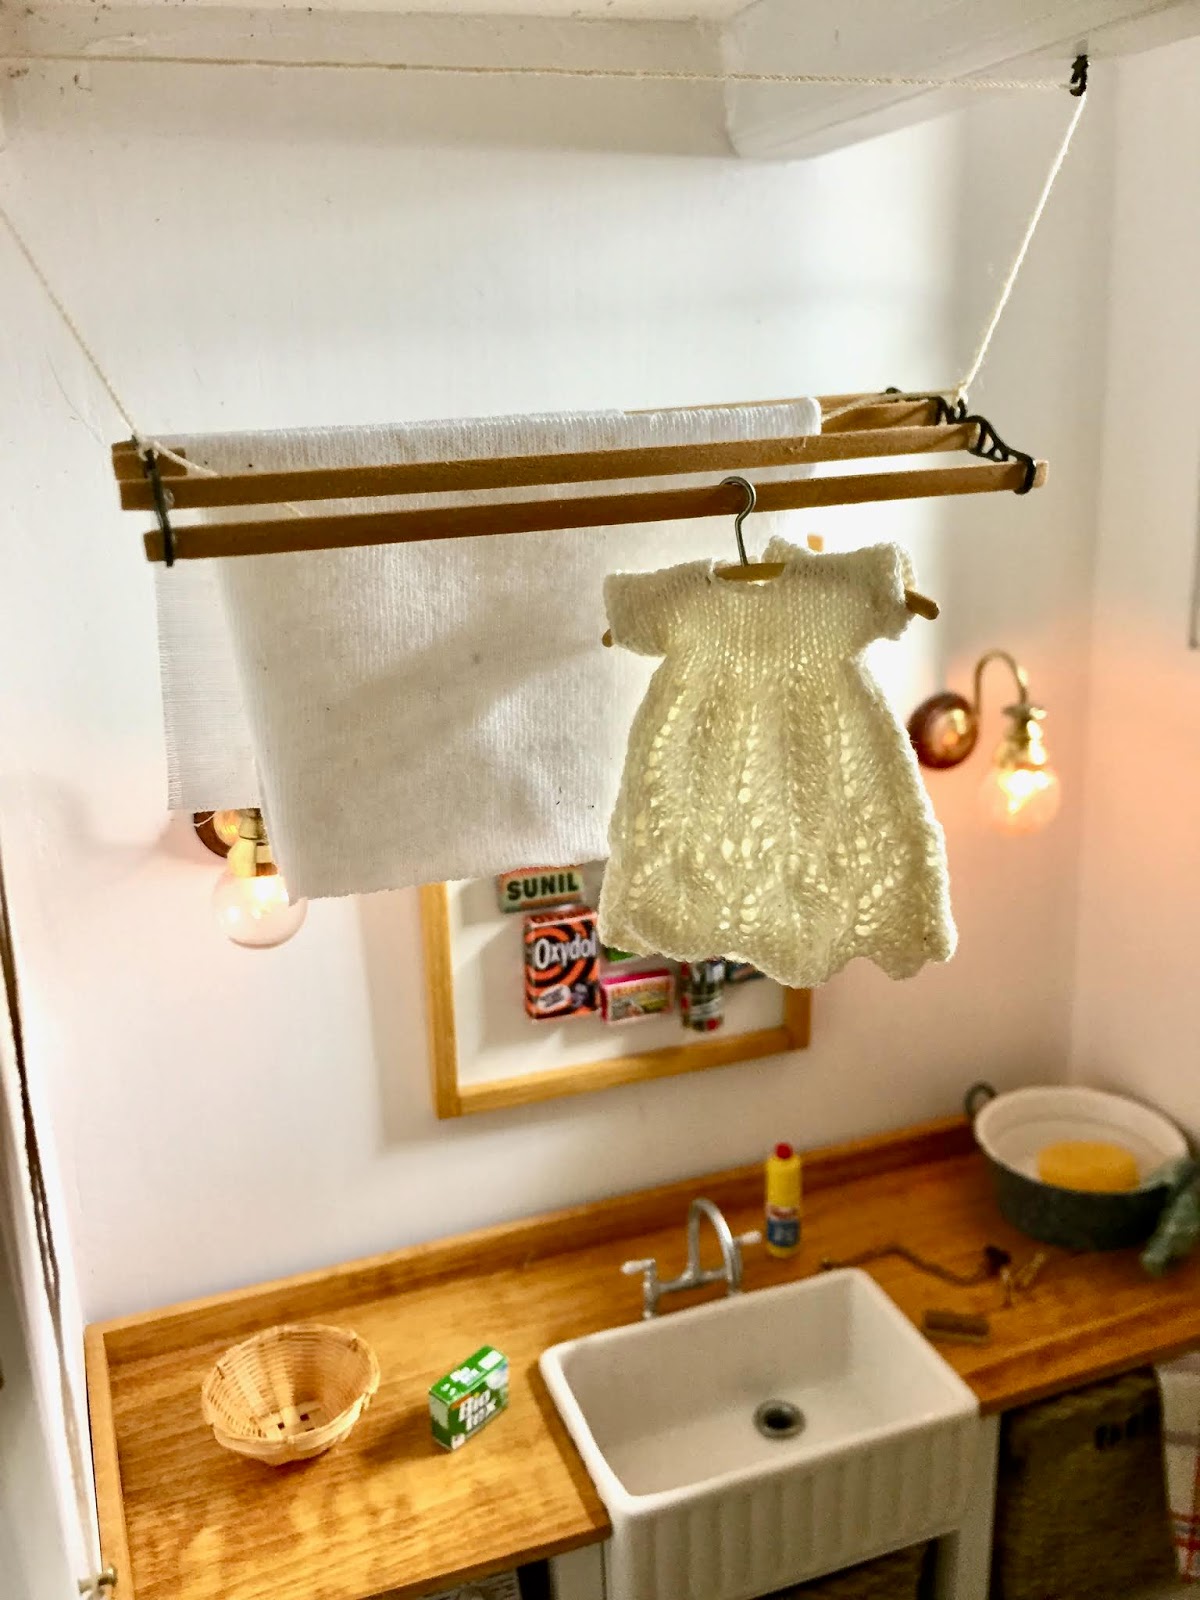
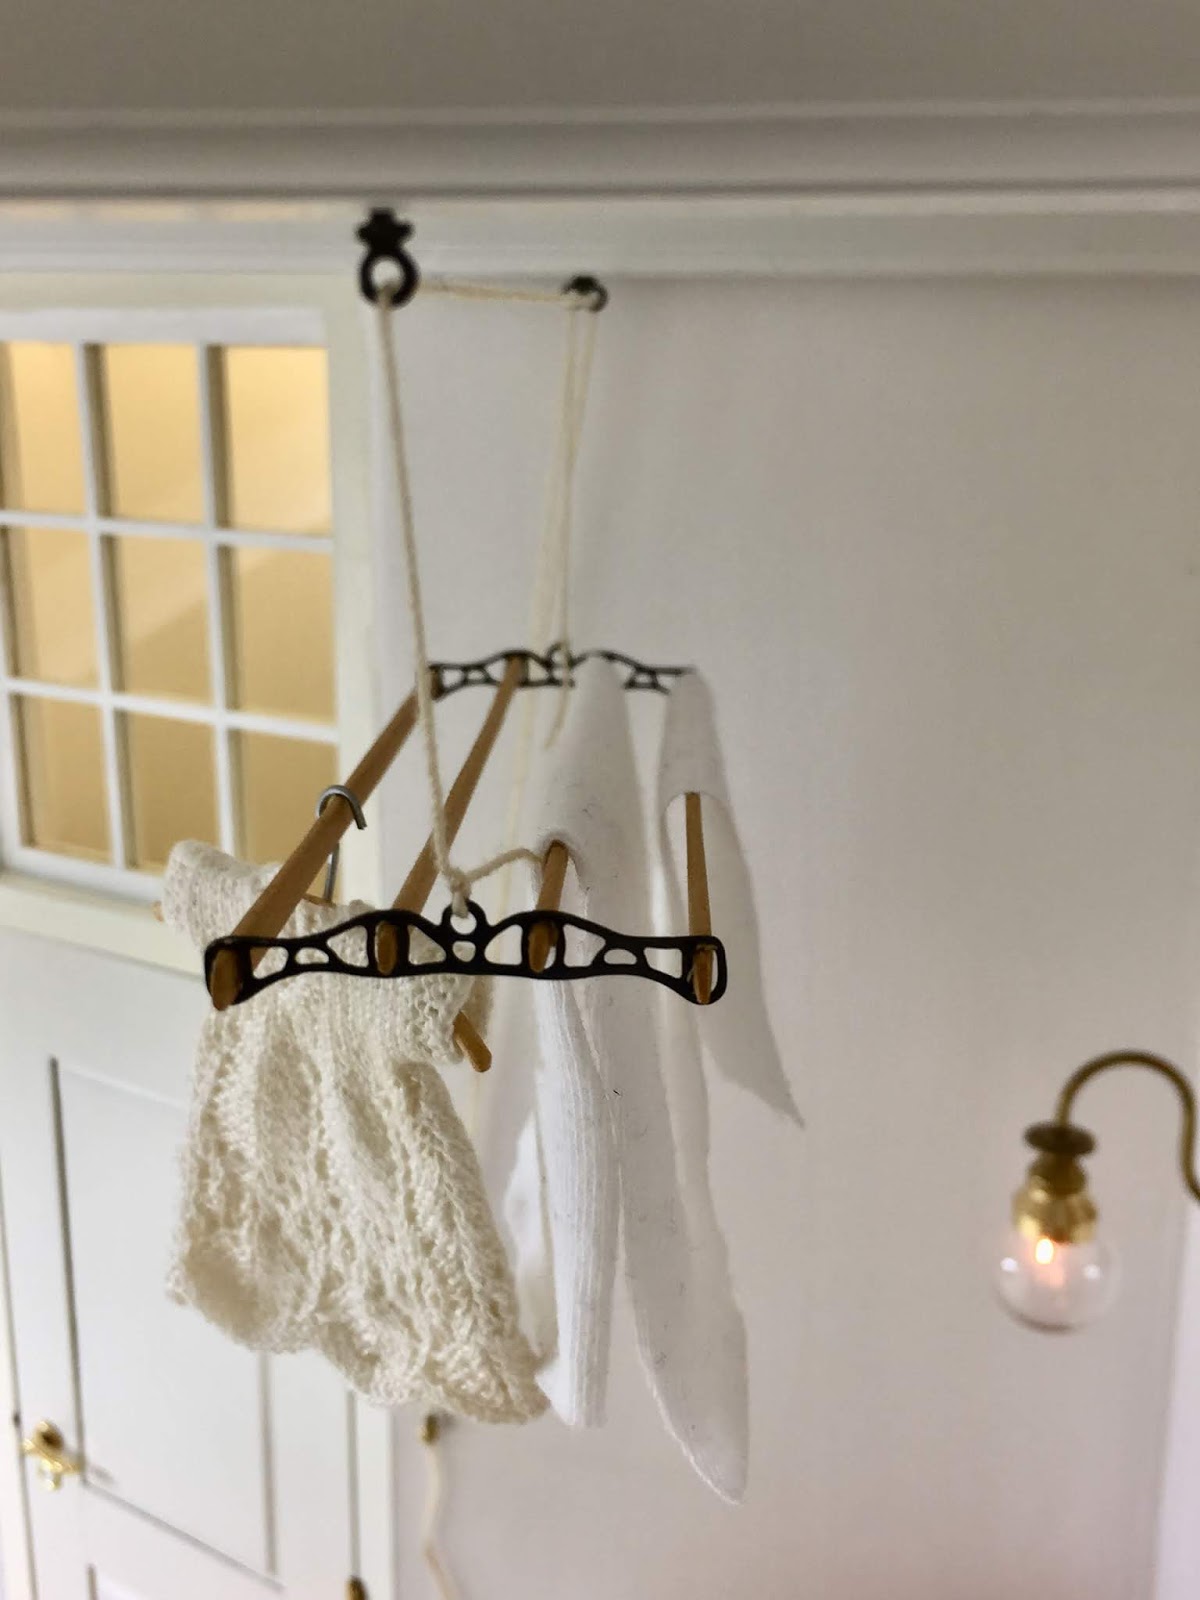
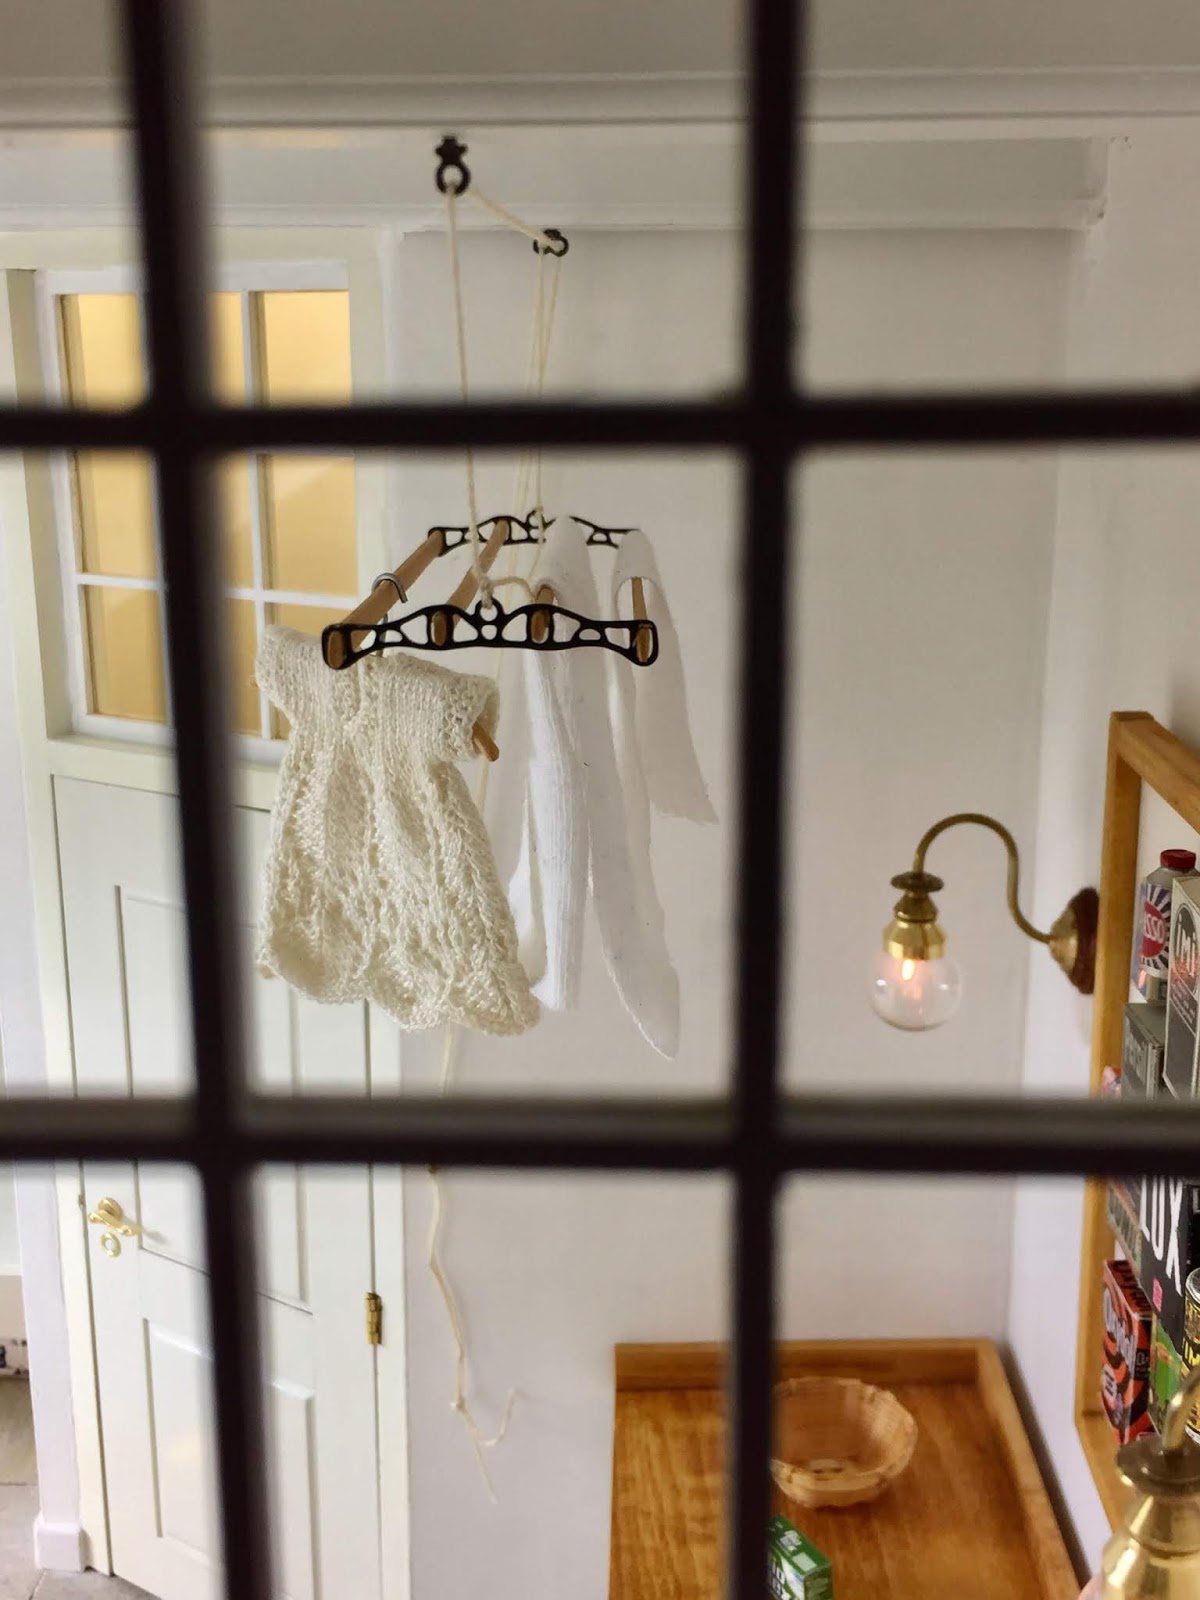
The last thing I added is a laundry pulley which is a clothes rack with arope and pulley system to raise and lower the rack. To make it a bit easier for myself I fixed the mounts to theceiling before I permanently attached the ceiling to the room.
I love this view through the window!
Just a few small things I need to fix now. I noticed the work top is not pushed against the wall fully and I forgot to clean off some of the plaster around the beam in the corner... That will be tricky to remove as it is so far back in the room and completely hardened by now...
And wash the windows as they have become dirty again when I filled thegaps between the walls and ceilings. Also I am still searchingfor bottles of laundry detergent, preferably environmentally friendly ;-)