

Sometimes, you just get a hankering for something salty and crunchy. Usually, that itch is scratched with a snack from a shiny, throwaway bag that has more multisyllabic chemical ingredients than there should be. But on a homestead seeking both a healthier lifestyle and a less wasteful existence, those Bag O’Salt crunchies really shouldn’t have a place on the pantry shelf.
So what to do? The same answer for most everything on the homestead — do it yourself! I contend that satisfying snack-making should be an important tool in anyone’s culinary bag of tricks. Because as good as homegrown tomatoes or zucchini may be, they’re not snacking material for most of us, especially if we’re in the middle of a workday and need a quick boost.
In this article, I want to share three easy-to-make, crowd-pleasing, and homestead-approved snacks that store well, scratch that snacky itch, and are made with real food.
Waste-Free Popcorn
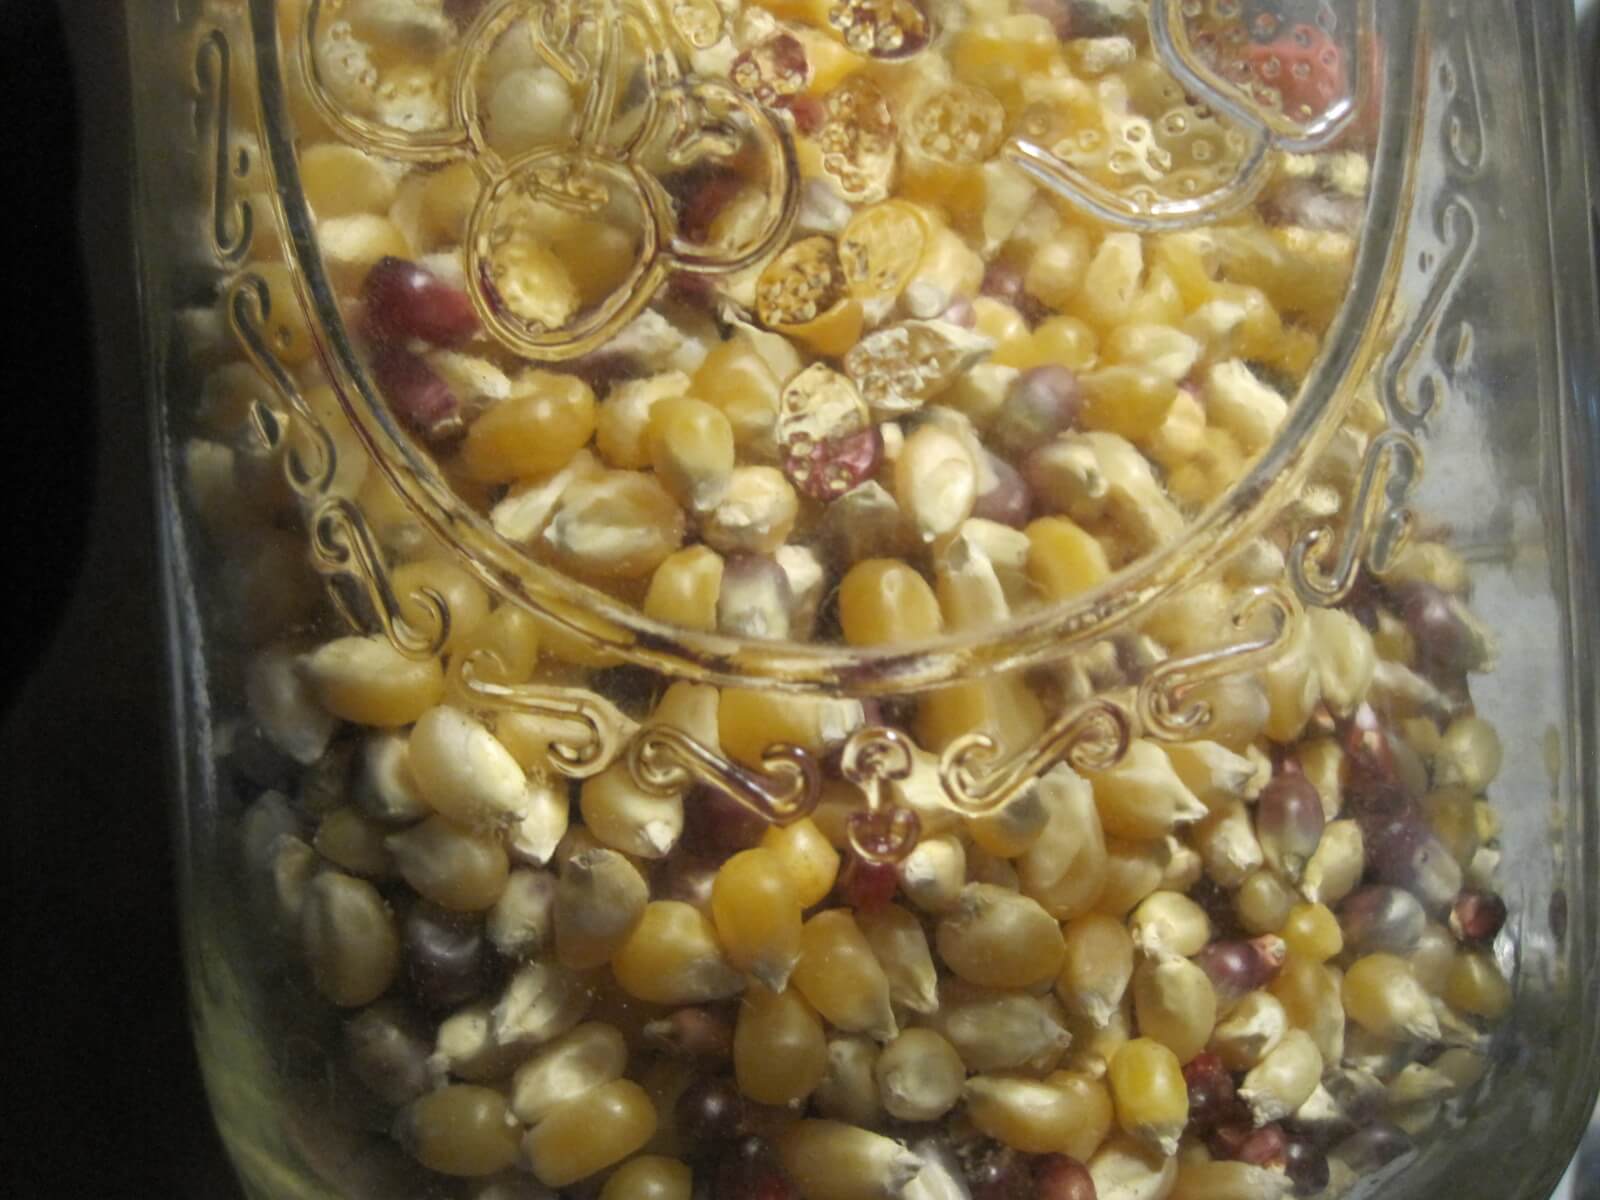
Popcorn is simple, good food. At least, it used to be. If you grab a microwaveable bag, an ingredient list that should read “popcorn kernels, oil, and salt” reads instead like a sci-fi horror roster. Let’s dial back the unnecessary modernization of this basic snack and strip the cellophaned, chemical-coated bag from our shelves. To make the best possible popcorn, all you need is a covered pan and a bit of finesse. Then see if you can choke down another bag of artificially buttered pops after tasting the real stuff.
Ingredients
- 1/4 cup of popping kernels (we order ours from Azure Standard)
- 1 tablespoon of oil
- Salt
- Flavoring spices (more on that in a minute)
Steps
In a large saucepan, place the oil and 5 to 10 kernels. Cover and heat over medium high, and listen. Once the first kernels pop, add the rest and cover. By shaking the pan back and forth, you’ll soon be serenaded with a lively percussion of fluffy, exploding kernels. Once the staccato beat slows down, remove from the heat and leave covered until the pan is finally quiet (if you open it too soon, some will fly out). That step is where the finesse comes in handy. If you wait too long on the heat, you’ll end up with burned kernels. Pull the pan off the heat too soon, and you’ll have a layer of unpopped missed opportunities on the bottom. Keep making popcorn, and you’ll be a pro in no time.
Dress with a drizzle of olive oil or melted butter and salt, and then flavor to your heart’s content.
Here are some of our favorite combinations.
- Smoked paprika, salt, pepper, garlic powder
- Cinnamon, cocoa powder, cayenne, salt, and a sprinkle of sugar
- Ground cumin, pepper, ground coriander, cinnamon, turmeric, and cayenne
Crunchy Beans
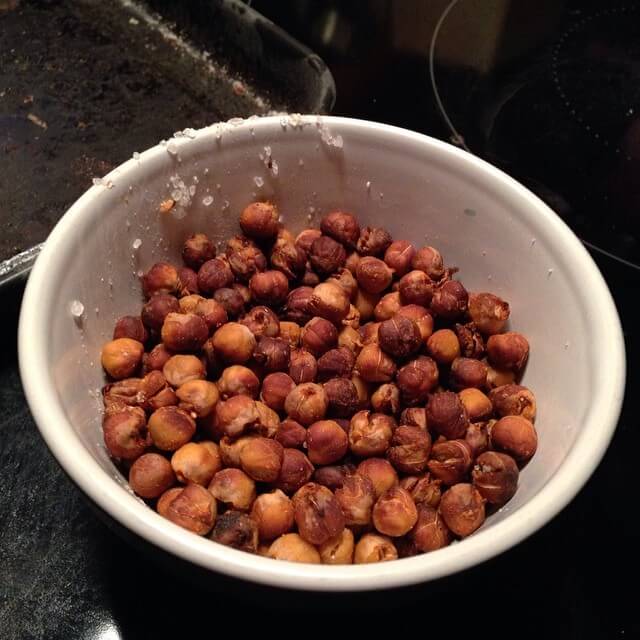
“Crunchy beans” is an underwhelming name that doesn’t do justice to these endlessly pop-able bits of tasty goodness, but it’s the name that stuck in our kitchen. The crazy part is, you don’t need to cook the beans — merely soak them, and they’re ready to transform into an amazing snack. Who knew the humble garbanzo bean could pack such a satisfying punch?
Ingredients
- 1 cup dried garbanzo beans, soaked for 24 hours
- 2 tablespoons oil of your choice
- Salt
- Spices of your choosing
Steps
Toss the soaked garbanzo beans with oil, salt, and whatever spices suit your fancy. Bake in a 375-degree Fahrenheit oven for an hour or so, tossing ever so often to make sure they’re toasting properly. They’re done when toasted a nice light brown, shiny, and perfectly crunchy.
As a side note, if you decide to flavor these sweetly (and yes, nutty garbanzo beans do handle being sweetened amazingly well), add your sprinkle of sugar AFTER the roasting process so they don’t turn to burned caramel and glue the beans to the pan.
Related Post: High Fat, High Protein Vegan Snacks
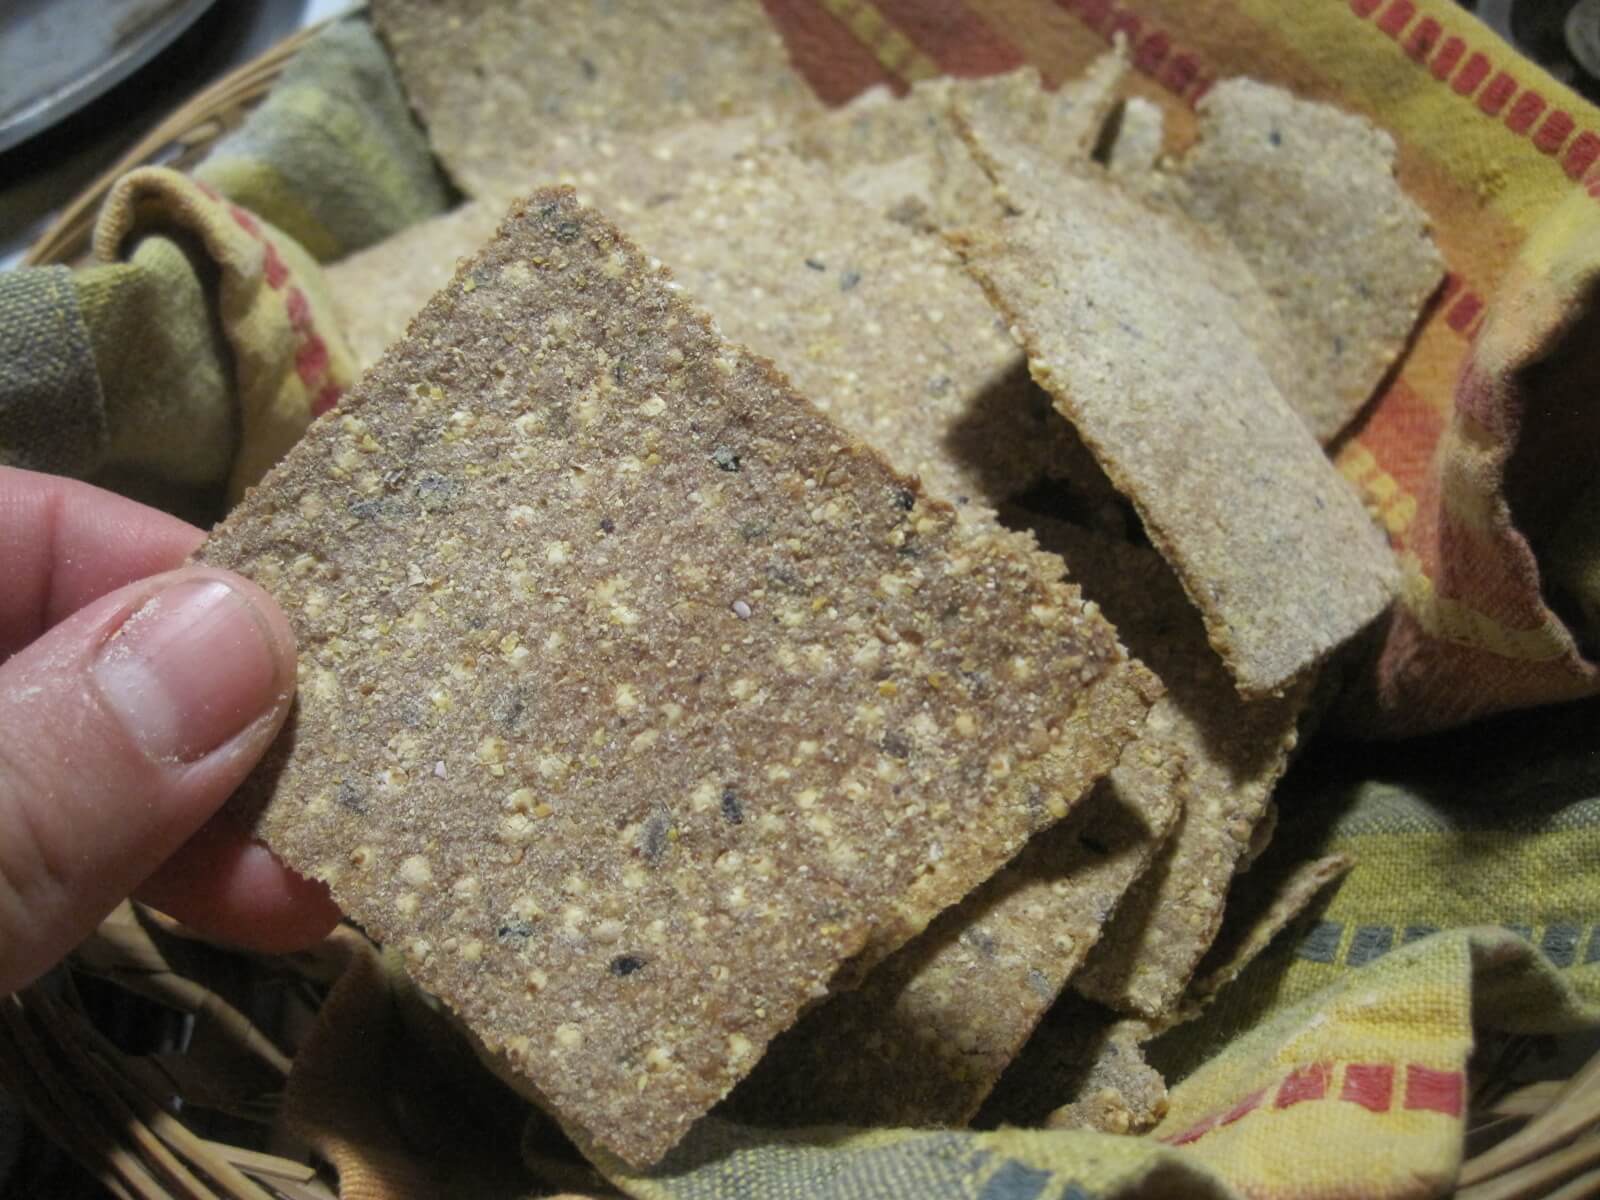
Infinitely Customizeable Crackers
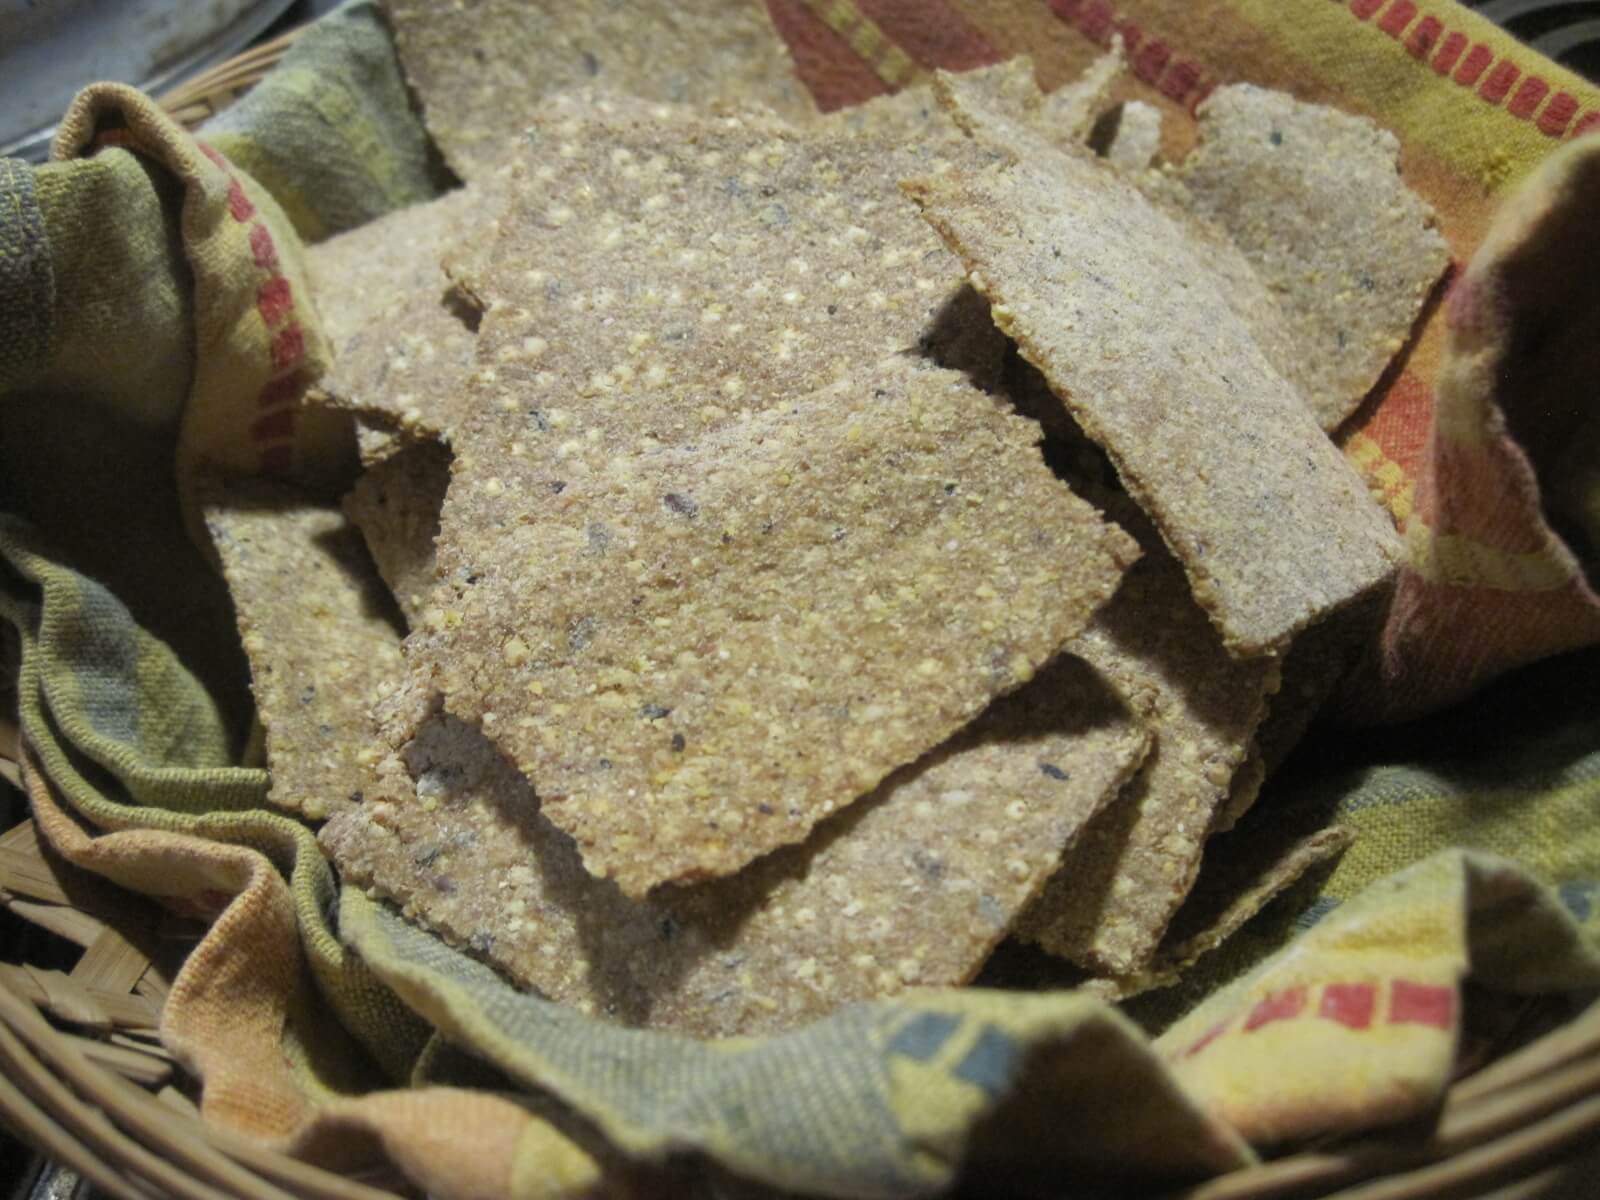
With the recipe for these crackers up your sleeve, you can turn out a satisfying snack that won’t leave you with orange fingers, more garbage in your bin, or that I-ate-the-whole-dang-bag feeling of regret. As a bonus, if you keep sourdough starter, they’re a great way to use up extra starter when you need to reduce and feed it but aren’t planning on making a whole loaf of bread. These crackers are a more involved snack to prepare than the first two, but they’re worth it if you make a huge batch.
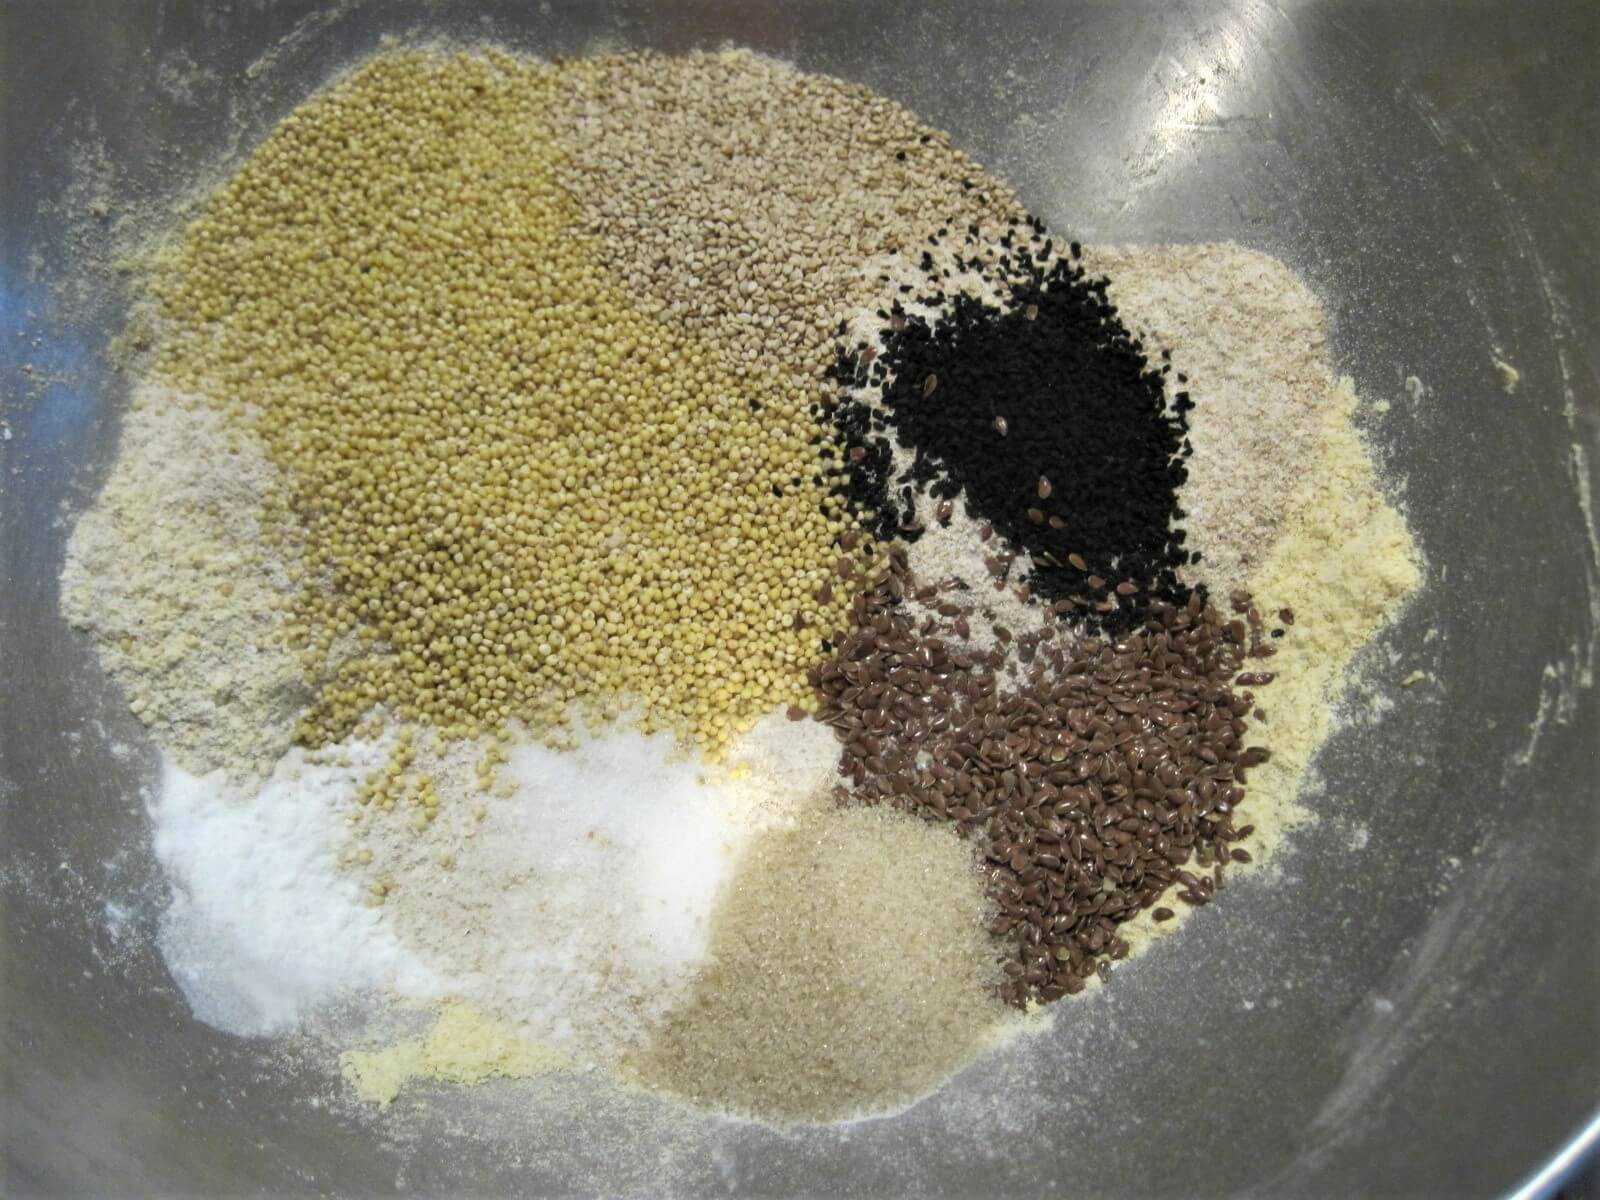
Basic Dough Ingredients
- 3 cups whole grain flour — if you grind your own flour, a tasty mix is 1/2 wheat, 1/4 rye, and 1/4 cornmeal
- 1 tablespoon unrefined sugar
- 1 teaspoon salt
- 1 teaspoon baking soda
- 3 tablespoons butter or oil of your preference
- Whatever extra sourdough starter you’ve got (no more than a cup, though)
- 1/2 cup of yogurt (if not using sourdough starter)
- Water
Additional Flavoring Ideas
- Seedy Option (my favorite): 1 cup of combined millet, sesame, flax, and nigella/kalonji seeds
- Sweet Option: 3 additional tablespoons of sugar, 2 teaspoons of cinnamon, 1/4 teaspoon of nutmeg, and a drizzle of honey during the last five minutes of baking
- Cheese Option: 1/2 cup of shredded cheese of your choice, plus parmesan for sprinkling on top
- Herbed Option: 2 teaspoons each of your favorite herbs like black pepper, rosemary, and oregano, or a different combination of cumin, red pepper flakes, and dill (seeds or leaves)
Steps
- Combine all dry ingredients in a large bowl and mix well.
- Crumble butter or oil into the flour mixture, and blend with your fingers until it looks like fine sand.
- Add wet ingredients, mix well.
- If necessary, add water a little bit at a time, until the dough holds together in a pliable, but firm mass. It should not be sticky at all. When in doubt, err on the side of too dry, rather than too wet.
- Preheat your oven to 375 degrees Fahrenheit.
- VERY IMPORTANT: Now, allow the dough to rest for 10 to 15 minutes. This resting step makes the all difference between an easy to work, easy to roll thin dough, and an annoying, fall apart mass of frustration. Don’t skip it.
- Sprinkle flour or cornmeal over a work surface, and roll half the dough out as thin as possible. I like to mix whole millet seed in my crackers for both the flavor and their surprise utility at this step — the ideal dough thickness is the width of a millet seed. When you roll the dough thin enough, the rolling pin will start making gritty sounds against the millet.
- Roll the thin sheet around your rolling pin and carefully transfer to a dry baking sheet.
- Using a butter knife, score the dough sheet into square cracker shapes (you can use cookie cutters to make these crackers in whatever shape you want, of course, but I find that far too fiddly. Square crackers taste the same and take far less time to roll out and bake).
- Prick each cracker in the dough sheet with a fork
- Follow the same process for the other half of the dough, and pop it all in the hot oven.
- Bake the crackers for 8 minutes, then start checking them for doneness every few minutes after that. The speed at which they cook is dependent on your oven and how thin you were able to roll them, so it’s hard to give an exact time for this step. Basically, you want them to be bone-dry, but not browning. Once they start changing color, they start tasting burned. And they cook fast (!) so don’t walk away for too long. I find that my nose is my best guide. As soon as I start smelling that nice, toasted bread aroma, I pull them out and check to see if they fracture easily. If they shatter, they’re good to go.
Note: If you find that the edges are cooking faster than the center, rotate the sheet halfway through cooking to help speed up the process,
- Once you remove the crackers from the oven, transfer the sheet to a drying rack to let it cool enough to handle. Then, merrily crack it into individual crackers. If any don’t break along the scores you made, and if you feel they’re too ugly to serve, it’s your right to snack on them right then and there.
- Serve in basket lined with a nice cloth napkin, or store in an airtight container. Pair them with soup, salads, cheeses and pickles, dips, or eat them on their own. They’ll last pretty much indefinitely, but you’ll never know that because they’ll get eaten well before then.
Now, those are just three of my family’s favorites. What are yours? Let us know in the comments below!