

This creamy coconut-filled pie can be made in minutes and is sure to be a hit with family and friends.
Cousins—have you heard it said that pie is one of the easiest desserts to make? While that is true, perfecting your crust can trip up newbie bakers. With this recipe, I use a storebought pie crust that only needs to be baked for 12 to 15 minutes. The rest of the pie is bake-free and can be made while the crust bakes!
What Is a No Bake Coconut Cream Pie?
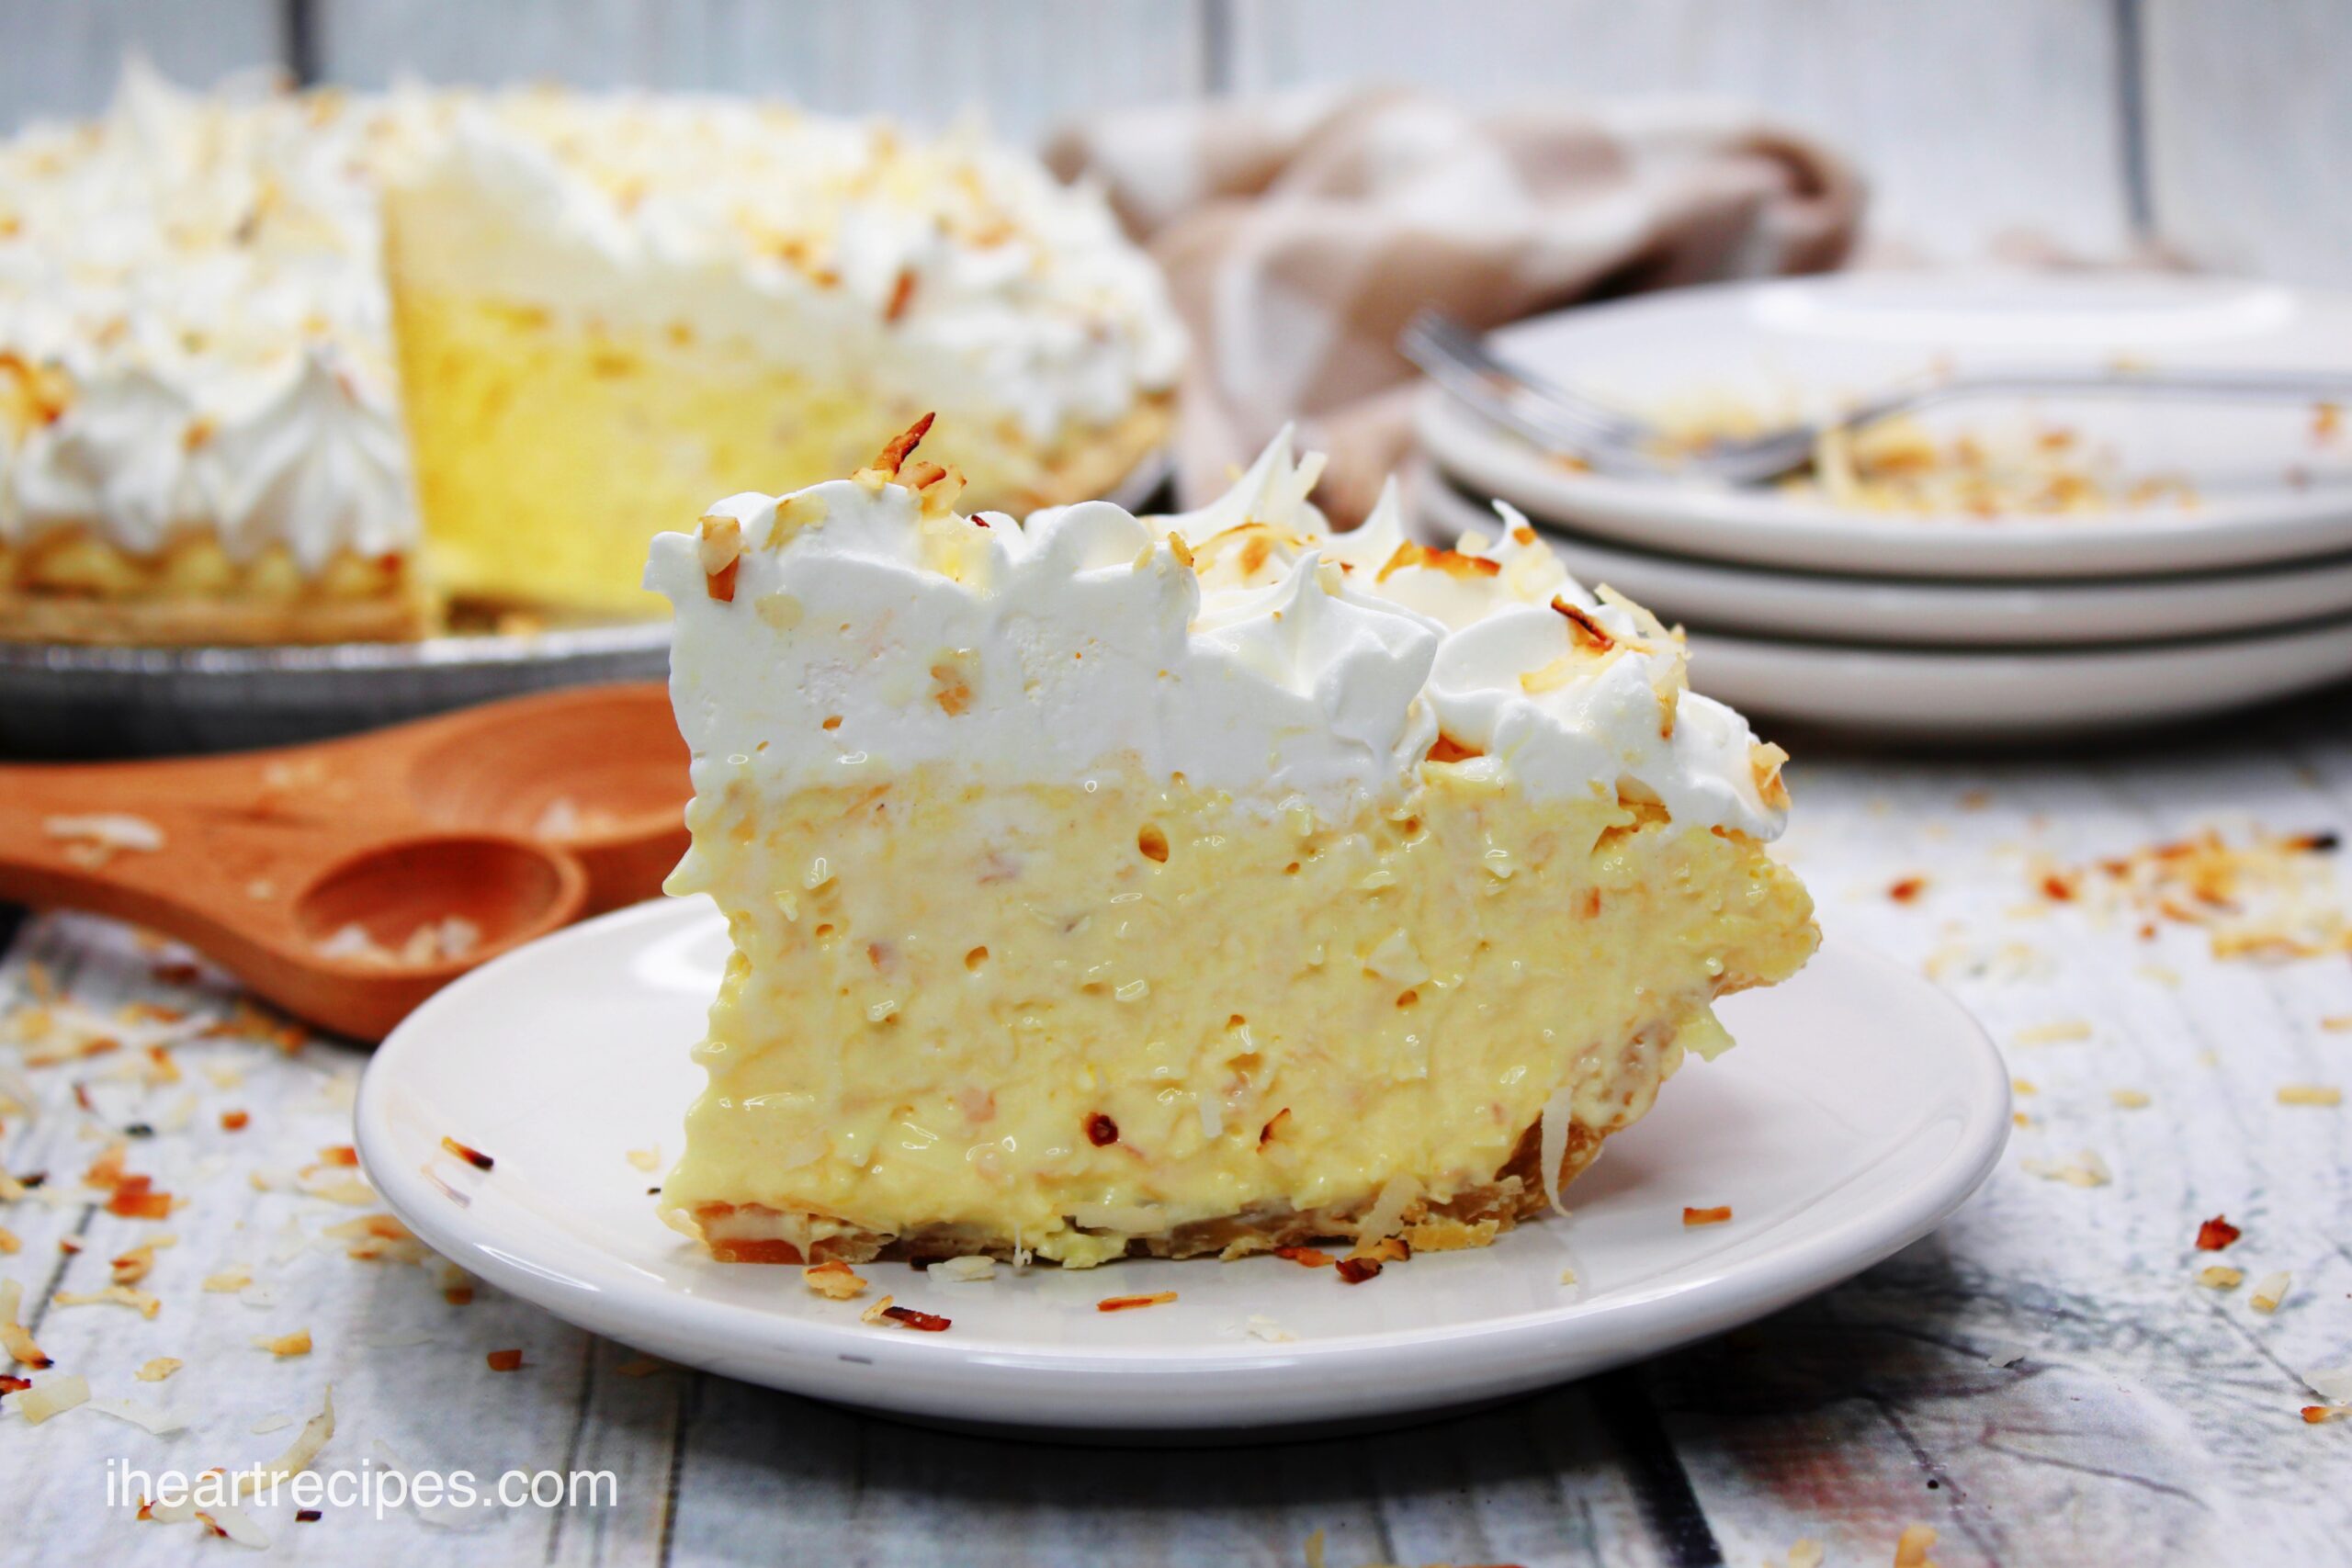
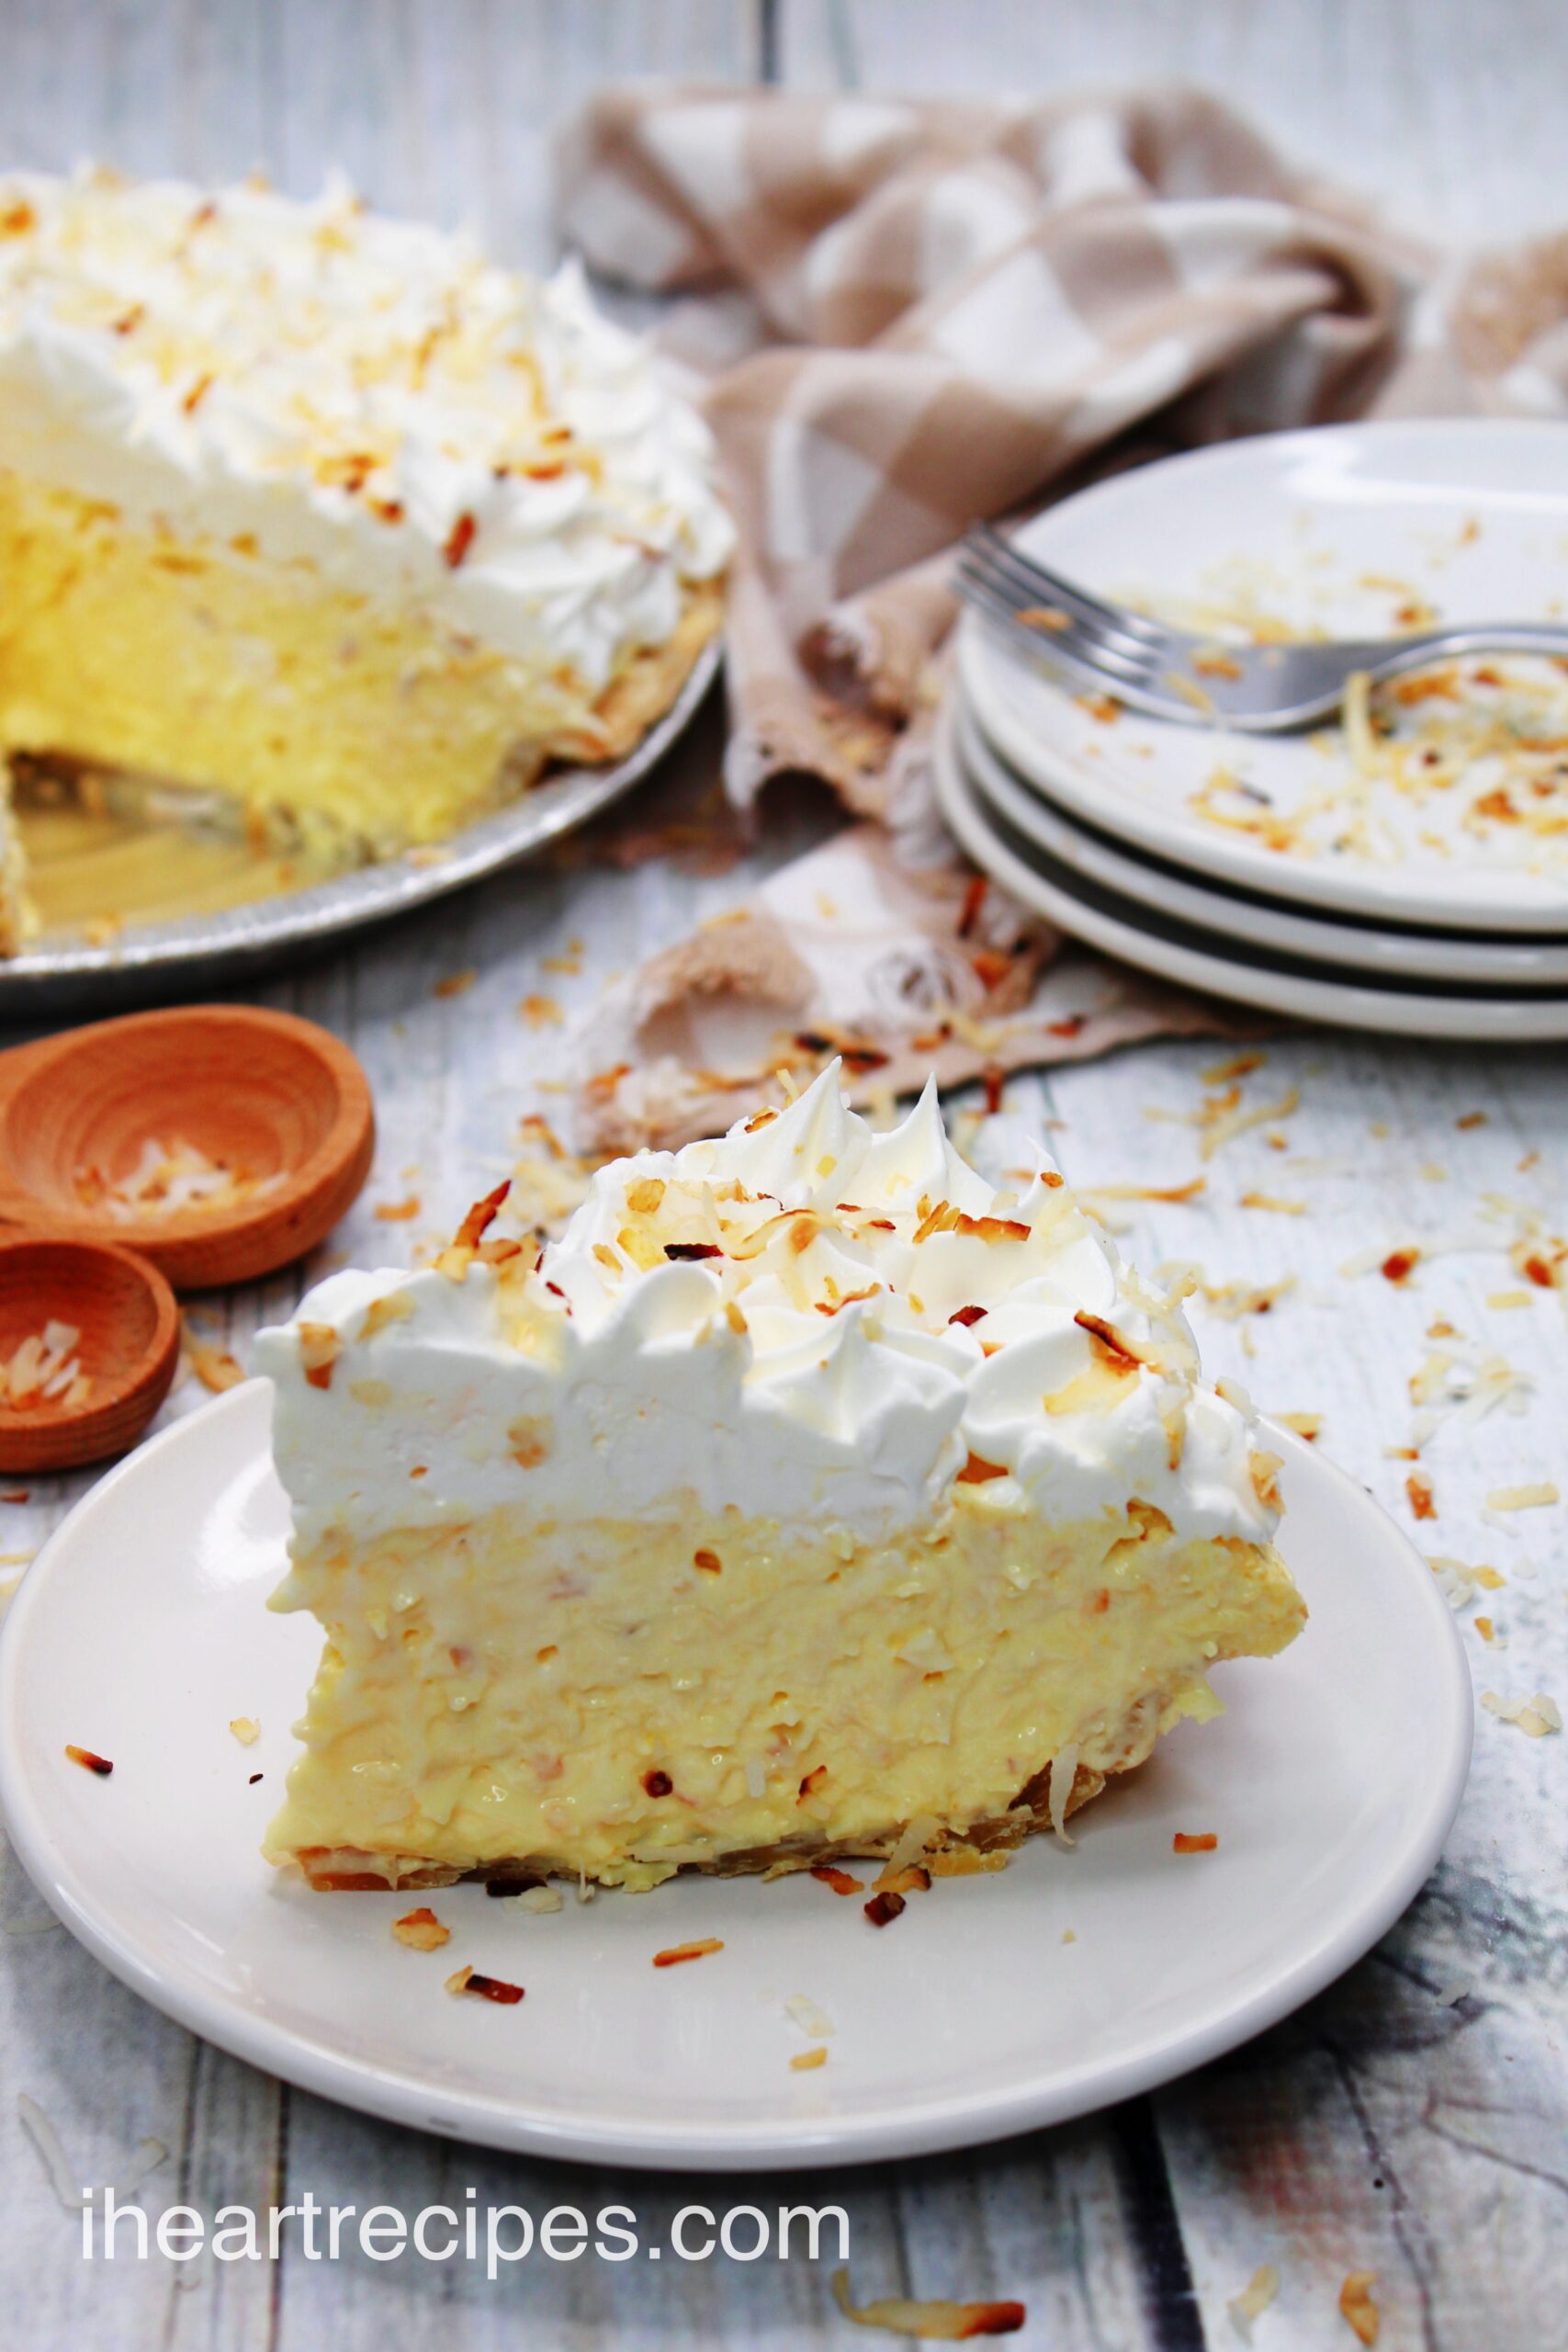
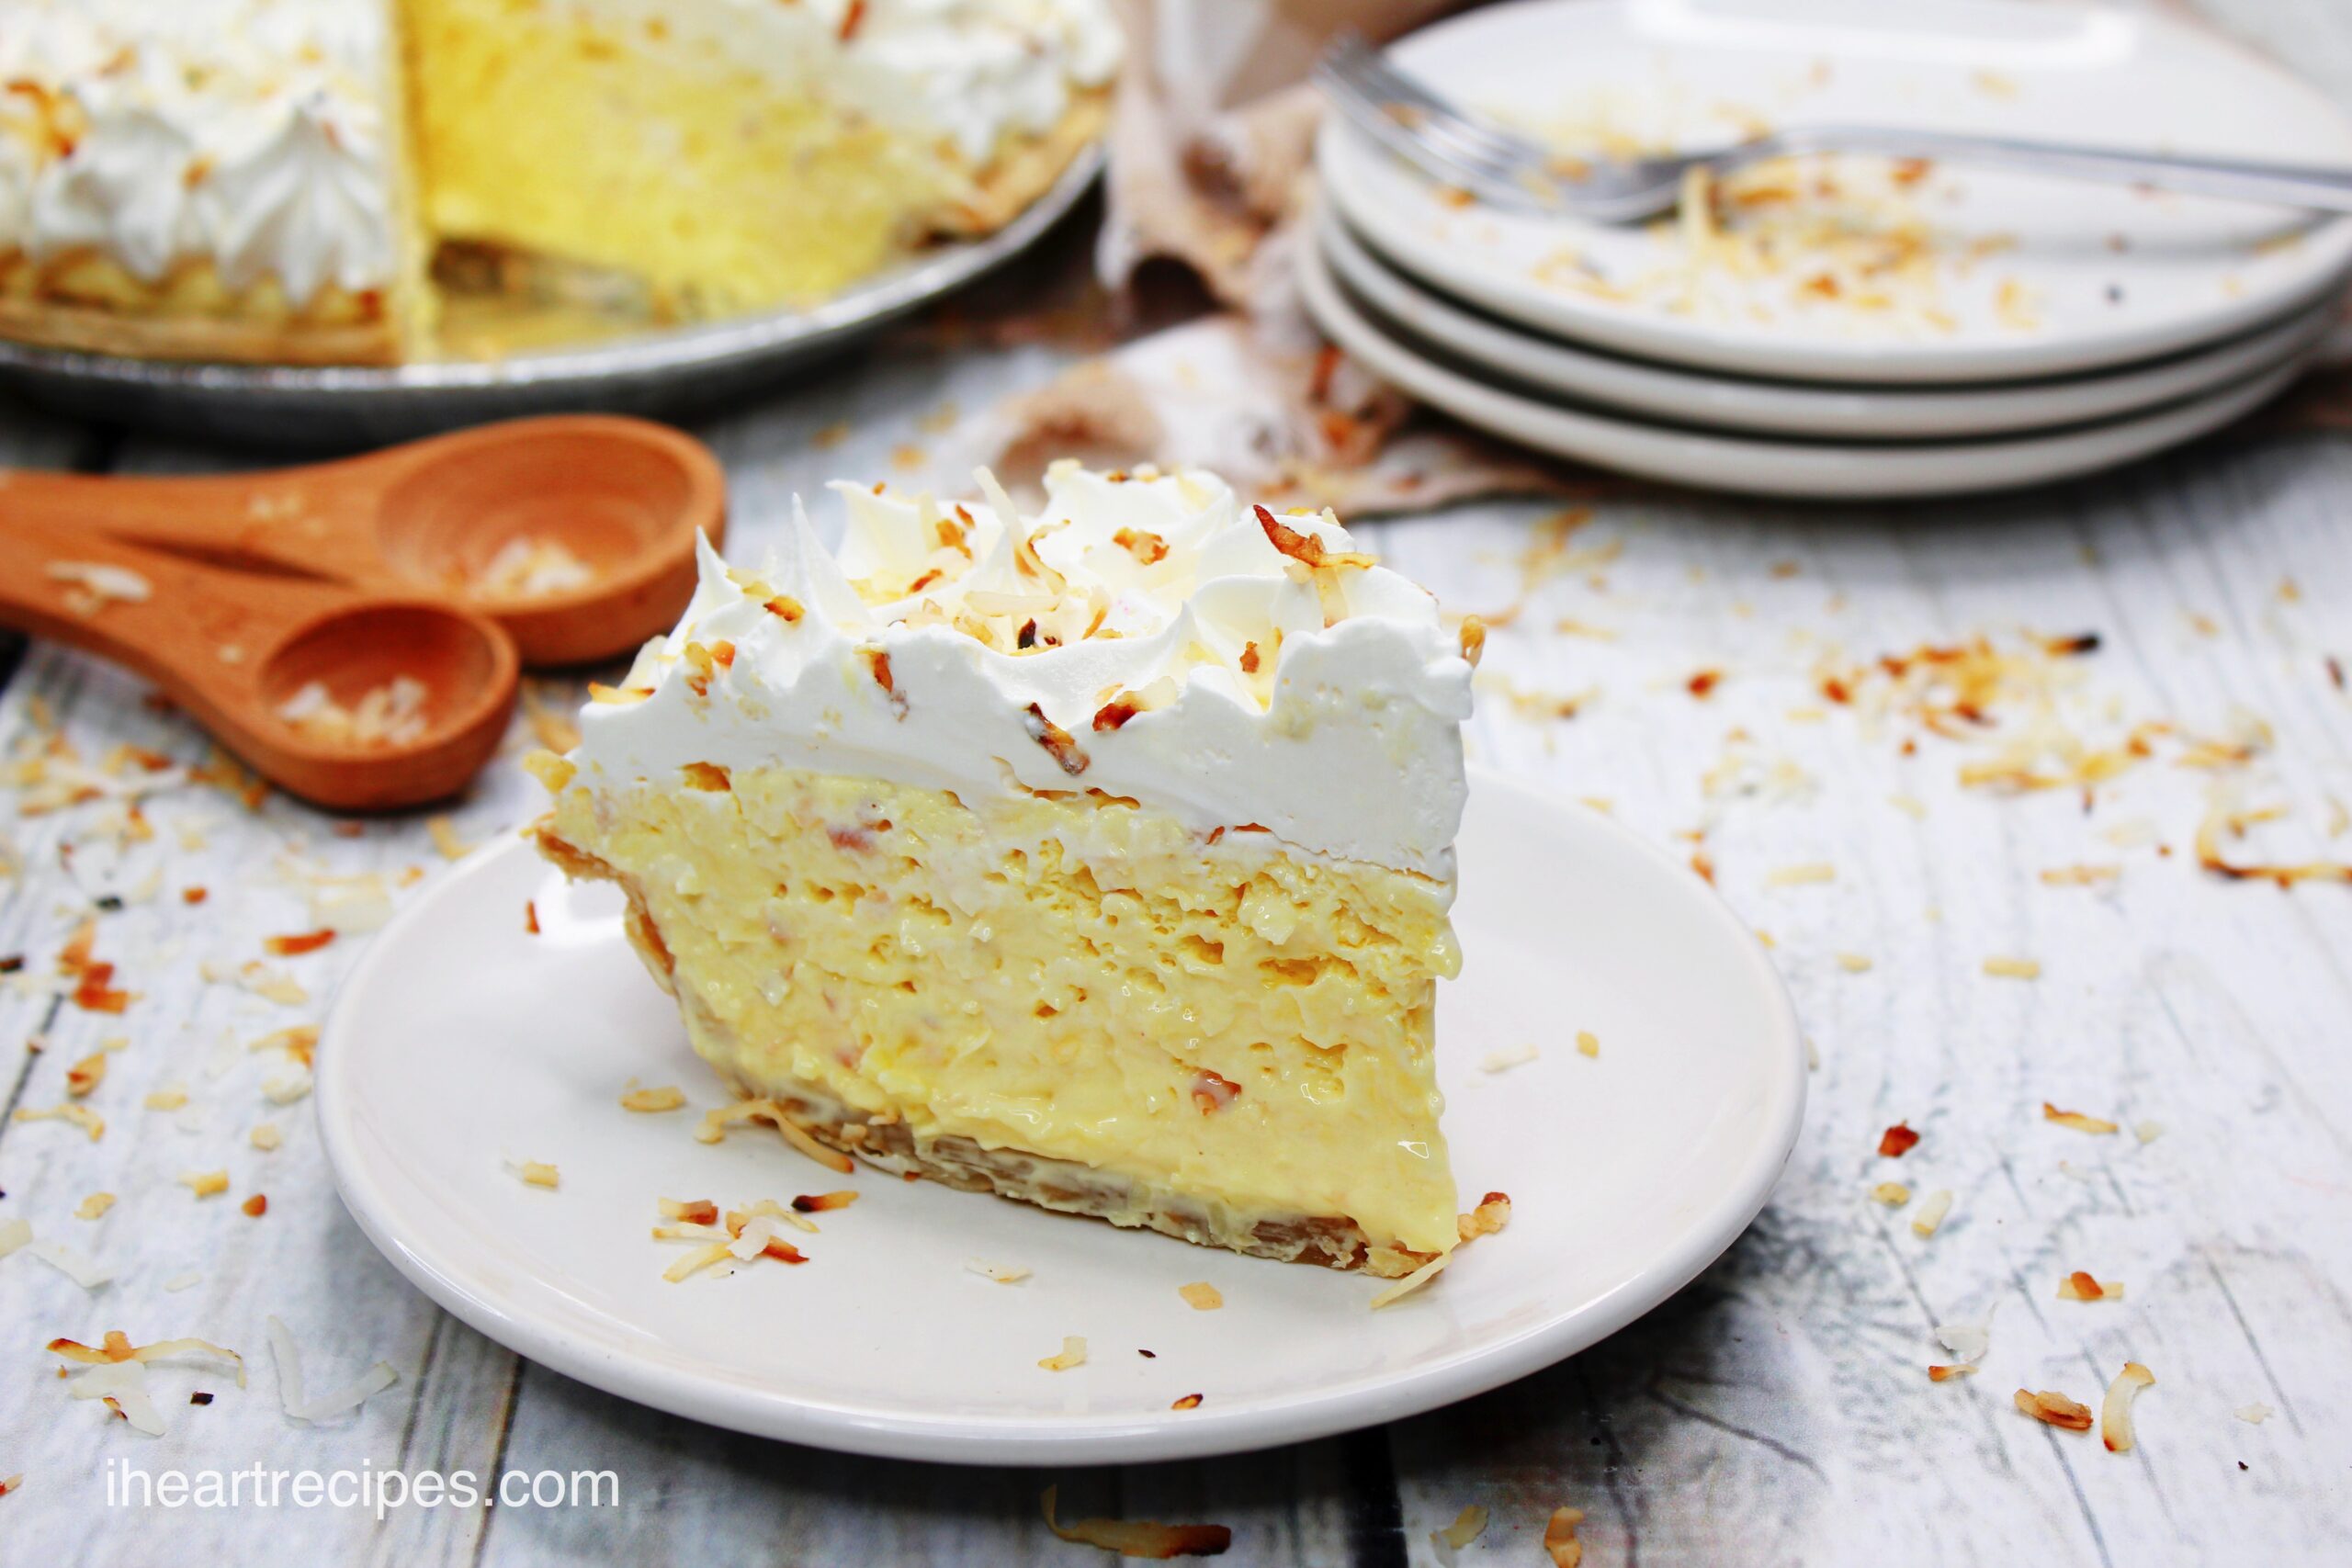
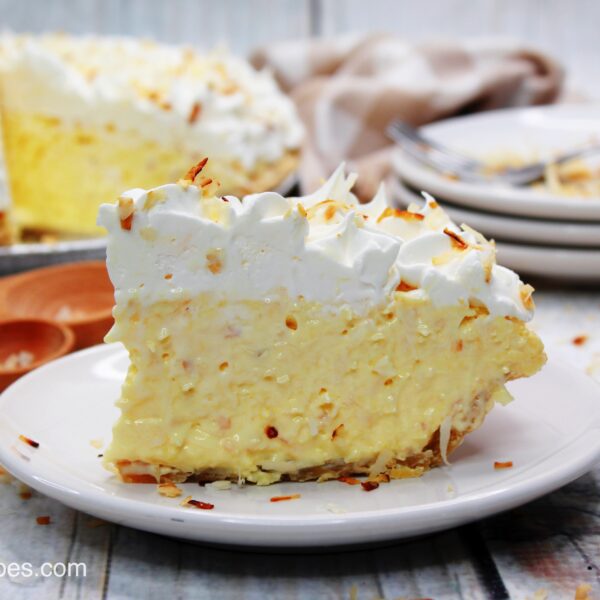
No Bake Coconut Cream Pie is a delicious and easy dessert that anyone can make. The filling is made with sweetened condensed milk, coconut flakes, vanilla pudding, and Cool Whip. Once chilled and set, the pie is topped with light and fluffy whipped cream, and toasted coconut flakes.
Ingredients and Shopping List
- Deep Dish Pie Crust—instead of making your own crust, purchase a refrigerated deep dish pie crust from Walmart or any grocery store.
- Sweetened Condensed Milk—adds sweetness and creaminess.
- Milk—cold milk, cow’s milk works best for this recipe.
- Vanilla Pudding Mix—2 (3.4 oz) boxes of instant vanilla pudding.
- Shredded Coconut—this will be divided. Some is mixed in, and the rest is used to top your Coconut Cream Pie.
- Unsalted Butter—unsalted butter is often used when baking to ensure a creamy texture and undisturbed sweetness.
- Cool Whip—1 (16 oz) container, separated to mix in and top your pie.
Supplies
- Medium Saucepan—this is used to lightly toast your shredded coconut.
- Deep Dish Pie Dish—this is a heavy and mile-high pie, so a deep-dish pie dish is a must.
- Large Mixing Bowl—to mix all of your ingredients.
- Measuring Cups—to portion and set aside your ingredients.
- Whisk—no mixer is required for this recipe.
- Mixing Spoons—use to mix the coconut while toasting and to fold in the Cool Whip.
- Cookie Sheet—a cookie sheet is used to make transferring the pie dish in and out of the oven a little easier.
- Parchment Paper—line the crust with parchment paper before topping it with your traditional pie weights or pantry pie weights.
- Pie Weights—if you don’t have pie weights you can use pantry pie weights such as uncooked beans, white sugar, or popcorn kernels.
- Star Tip Disposable Piping Bag—you can also use reusable piping bags if you have them, but disposable bags are easier to clean.
- Oven Mitts—you will need mitts or potholders.
- Optional—baking rack to cool your crust and fork if you don’t have pie weights.
Why Do I Need Pie Weights?
When a recipe calls for the crust to be baked before the filling, pie weights are required. Pie weights are food-grade ceramic marbles that weigh down the crust, keeping it from bubbling while baking.
What happens if my pie crust bubbles? If your crust bubbles your pie filling won’t lay as flat. Since this pie filling is heavy, it is even more important that your crust lays flat. Otherwise, it may overflow. At the very least, it won’t slice evenly.
What If I Don’t Have Pie Weights?
Not to worry, as you likely have something in your kitchen pantry that you can use instead, such as:
- Uncooked beans
- Uncooked rice
- Un-popped popcorn kernels
- White sugar—brown sugar won’t work
- Another pie dish
- Dock with a fork
What is docking?—if you don’t have anything that will serve as a pie weight, use a fork to poke holes in the bottom and sides of your pie crust. This will allow air to escape to minimize bubbling. Dock your crust every half inch or so.
How to Use Pantry Pie Weights?
- Preheat your oven to 425 degrees.
- Line the pie dish with the pie crust as directed in the pie crust instructions.
- Remove the pie crust plastic and fully cover the crust with parchment paper.
- Remove the beans, rice, or popcorn kernels from their bag or container.
- Pour your ceramic or pantry pie weights all the way up the sides of the pie dish.
- If you don’t have enough weights to layer on top, feel free to combine your weights. For example, you can use 2 or 3 types of beans if that is what is required to fill your pie dish.
- If you are using a pie dish, use one that is ideally the same size so that it adds weight to both the bottom and sides of the pie dish.
- Bake your pie crust for 12 to 15 minutes until the edges and bottom are golden brown.
- Pour your pie weights into a heat-safe container or remove your doubled-up pie dish and set it on a heat-safe surface to cool.
- Set your crust on a baking rack or place it on the stovetop to cool.
- Let your pantry pie weights cool and return them to their original container to use for future recipes!
Can I Make My Own Crust?
Absolutely! Store bought crust is faster and easier, and something many skilled bakers use as a baking hack. That being said, if you enjoy making your own crust, go ahead and make your own!
Why Use Disposable Piping Bags?

They’re just easier to use! You can purchase both reusable and disposable piping bags online or in stores like Walmart, Target, or on Amazon. You can even find silicone piping bags!
If you don’t decorate desserts often, it may be easier to use a disposable option, simply because they don’t require cleaning. Cross-contamination, proper cleaning, and fully drying after washing are an issue with standard plastic piping bags. This is why many bakers have transitioned to disposable or silicone.
However, disposal isn’t environmentally friendly. Silicone is environmentally friendly and easier to clean, sanitize, and prop up for proper drying.
Have A Star Tip But No Piping Bag?
No worries! If you’ve run out of disposable bags, just cut the tip off of the corner of a zip-top baggie. Then slide the tip in, fill the bag with the remaining Cool Whip, and top your No Bake Coconut Cream Pie.
Other Easy Breezy No Bake Desserts
Whether you want to serve more than one dessert or want to give a few other no-bake recipes a try, these options will tantalize your tastebuds:
- No Bake Pina Colada Cheesecake
- No Bake Lemon Cheesecake
- No Bake Butterfinger Pie
- No Bake Oreo Cheesecake
Coconut Cream Pie
Equipment
- 1 disposable piping bag with star tip
Ingredients
- 9 inch prepared refrigerated deep dish pie crust
- 14 oz. can sweetened condensed milk
- 1 cup cold milk
- 2 3.4 oz. boxes instant vanilla pudding mix
- 2 cups sweetened shredded coconut divided
- 1 tbsp unsalted butter
- 16 oz. container Cool Whip
Instructions
- Preheat the oven to 425 F.
- Melt 1 tbsp unsalted butter over medium heat, in a medium sized saucepan
- Once butter is melted, add in 1 cup of the shredded coconut and mix until lightly toasted.
- Sprinkle the coconut & butter mixture onto a cookie sheet or plate and allow to cool completely.
- Place the premade pie dough into a pie pan, and fill the crust with pie weights. (If you don’t have pie weights, you can use dry beans).
- Bake the pie crust in the oven for 12-15 minutes or until the edges are a light golden brown.
- Remove the weight from the crust, and let cool completely.
- Using a large bowl, whisk together sweetened condensed milk, milk, pudding mix, 1 cup sweetened coconut and ¾ cup toasted coconut.
- Fold in 1 cup of Cool Whip .
- Scoop the batter into the pie crust and smooth evenly.
- Refrigerate overnight to make sure the pie has set fully.
- Scoop the rest of the cool whip into the piping bag, and pipe dollops all over the top of the pie.
- Sprinkle the top of the pie with toasted coconut.
- Serve, and enjoy!